Having trouble viewing the Table of Contents? Click here for a non-Flash version
The Organization Settings configure the basic business rules that apply to or set default values for VeriTime throughout your organization.
To access them, click on the Configure tab on your VeriTime home page and then click Organization Settings
Once you access the Configure page it will already be in edit mode. To Save any changes you make click the green Save button. To cancel any changes click the Cancel button.
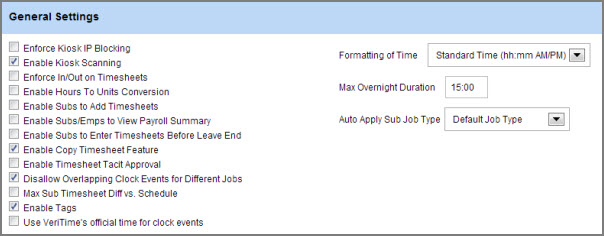
Enforce Kiosk IP Blocking – This will force all clock entries to be done from within your specified IP address range.
Enable Kiosk Scanning – The will turn on the ability for you to use the barcode scanning feature in VeriTime.
Enforce In/Out on Timesheets - When this box is checked, whenever you enter time manually on a timesheet, you will be required to enter both the In and Out times together. It will not allow you to enter just one of those times. (This does not apply to any activity occurring through a clock kiosk.)
Enable Hours To Units Conversion - This will turn on the ability to convert hours to units in VeriTime. The Hours to Units setup will show in your Home Menu and units will be calculated in reports.
Enable Subs to Add Timesheets - This will allow substitutes who use VeriTime to add their own timesheets.
Enable Subs/Emps to View Payroll Summary - This will allow your employees and substitutes to view the Payroll Summary report.
Enable Subs to Enter Timesheets Before Leave End - If a sub has the permission to add timesheets this setting will allow them to enter the timesheet before the absences have ended.
Enable Copy Timesheet Feature - This setting controls if the Copy Timesheet feature in VeriTime is visible to all users in your organization.
Enable Timesheet Tacit Approval - This setting enables you to tacitly approve timesheets in your org. You can specify the number of days to wait after the period is complete and how many prior weeks to look back. These settings will appear under Timesheet Settings once you click the box.
Disallow Overlapping Clock Events for Different Jobs - Marking this box will disallow any clock events from different jobs to overlap.
Max Sub Timesheet Diff vs. Schedule - Marking this box will allow you to specify the maximum amount of time a sub is allowed to exceed an absence duration. A box will appear where you can enter the number of hours/minutes.
Enable Tags - Check this box to enable the Tags feature in VeriTime.
Use VeriTime's official time for clock events - This setting allows your Org to bypass the clock on the local computer that is used to run the kiosk and to use VeriTime's official time instead. This will ensure that the kiosk in running on the proper time, and clock events are always accurate. Using this feature will reduce the instances of human error and mechanical failure affecting the kiosk, and offers added security against clock event tampering.
Formatting of time – Select if you want VeriTime to display times as 12-hour AM/PM or as 24-hour military time.
Max Overnight Duration – The number of hours that are allowed to pass in an overnight shift until Veritime assumes the worker has forgotten to clock out and will log their next clock action as a clock in.

Start of work week – Select which day of the week begins your work week for overtime tracking purposes.
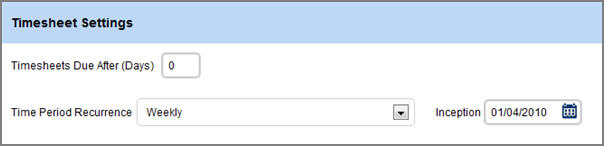
Timesheets Due After – This will set timesheets due this number of days after the end of the time period. (Used when employees manually enter and submit time.)
Time Period Recurrence - This controls the ranges of time the Timesheet Review will be broken down into.
Inception - The initial date for timesheet inception. This date must be in the past from when you start with VeriTime, and we recommend that it also be for a day of the week that matches the Start of Work Week setting. This will most likely be set up by your implementation representative and you will never have to change it.
A position is a defined role within a school district which reflects a job type and can reflect budgeted FTE, Location, Work Schedule, Default Account Code and one or more assigned users. Multiple combinations of (Locations, Work Schedules, Account Codes, and FTE) can be assigned to a position definition.
The position is the hub of the wheel, so to speak. The position relates a user to a job type at a location with a work schedule and is to be applied to an account code and fulfills certain budgeted FTE’s. A position can be for one user or represent many users. The position defines a needed role within the school district and users are placed within that role.
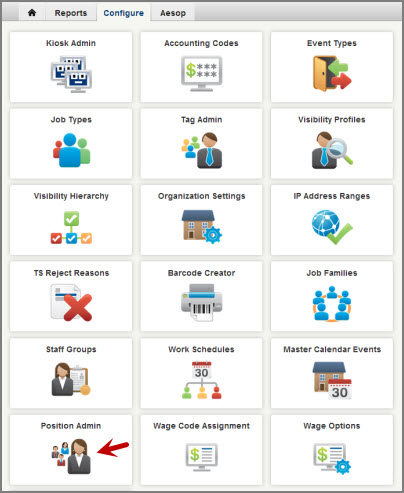
To access the Position Admin page click that option under the Configure tab.
This web page will allow you to specify positions to be worked within your district. Each position is associated with a job type and has effective dates. To add a new position click the green “+” icon at the top of the list. To edit an existing one, click the pencil icon. To delete one click the trash can icon.
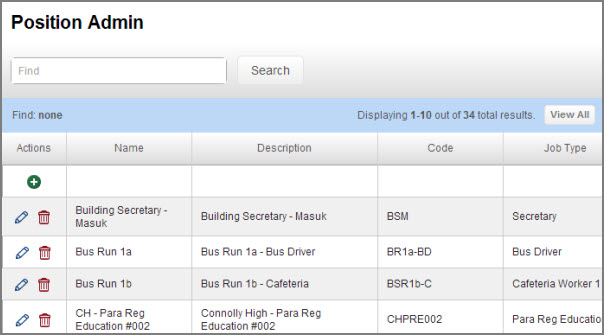
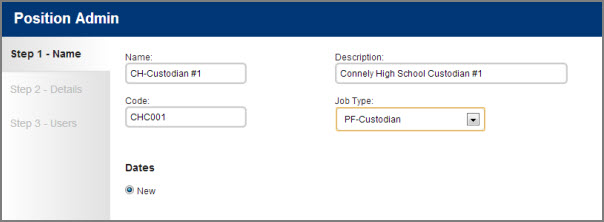
Note: Create a name that is easy to understand and reference when viewing the list of positions. Also, name the position something that is easy to search on. Include the associated job type in the name. If the position is established for a specific location/facility, include the name of that location.
Choose the job type that this position will be associated to.
Click the Next button to move to the next step.
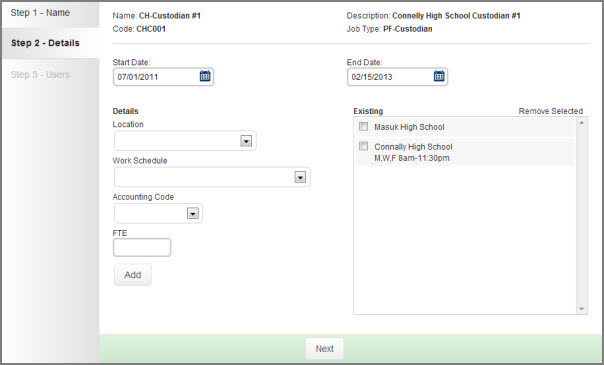
On the details screen give the position its effective dates.
You can also add a specific location, work schedule, accounting code, and/or FTE. To add these details to the position click the Add button. Once you have added them they will show up in the Existing column.
Click the Next button to move to the next step.
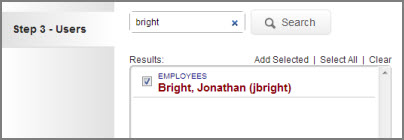
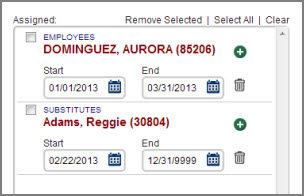
On this step you can add specific users to the position. Search for the users by using the search box. Once you have the user you want to add check the box next to their name and click the Add Selected text.
Note: If a user's name has a
strikethrough on it that means that the user has already been
assigned.
Note: You can add multiple users to one position.
Once you have the user in the Assigned area you can adjust their effective dates. You can also add more effective dates by clicking the green plus icon. You can delete the dates by clicking the trash can icon.
Once you have finished assigning users to the position you can click the Final button to create the position.
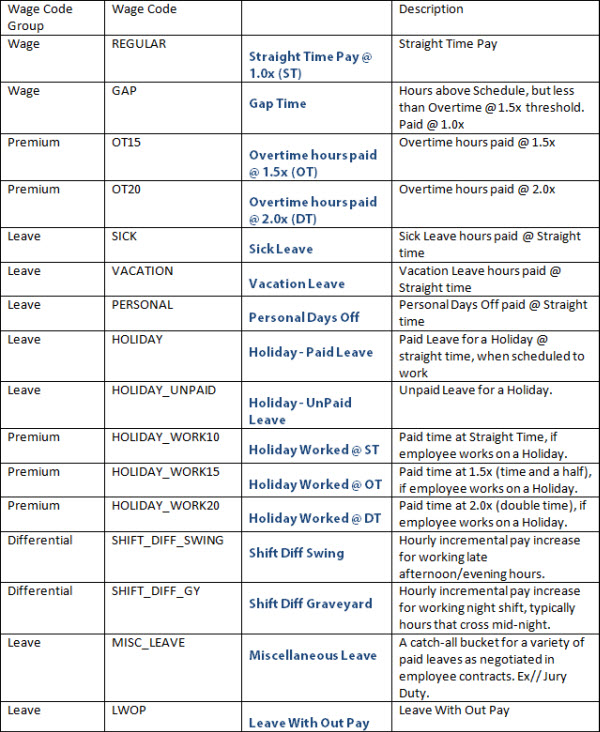
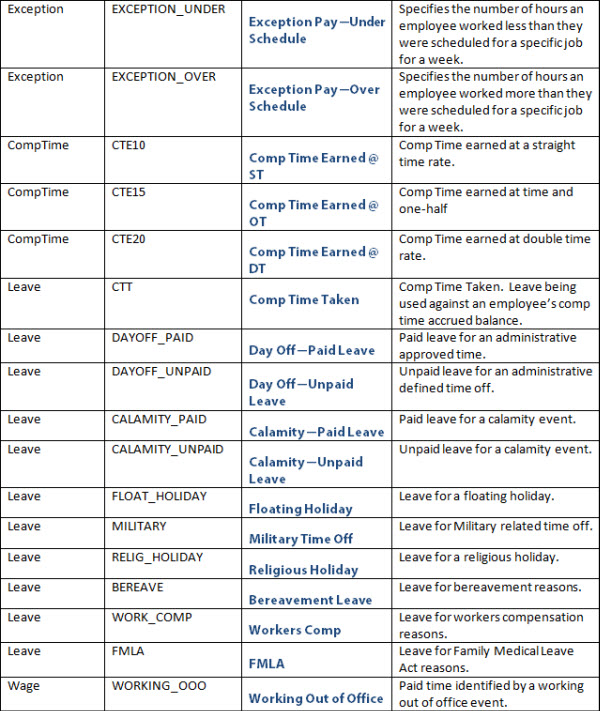
A Wage Code is a mechanism that allows VeriTime to communicate to a payroll system how a user’s (work, leave, scheduled) time is to be compensated based on a defined set of payroll rules for the job that employee works.
To access this page click the Wage Code Assignment option under the Configure tab.

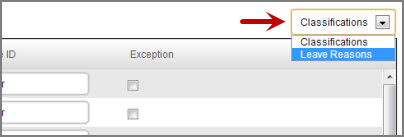
The page has two sections, Classifications and Leave Reasons. You can switch between the two by using the selector in the top right corner.
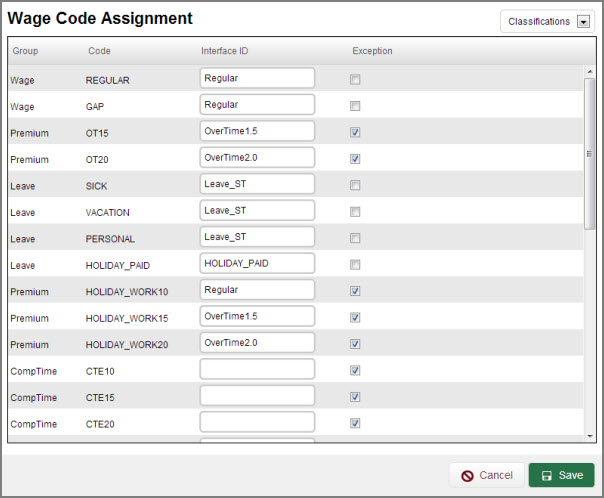
This grid displays each Wage Code available in the system and allows you to provide an Interface ID and whether the Wage Code should be an exception to the district. Exceptions are called out on the Timesheet Review web page. The Interface ID provides a way to link your payroll system codes with VeriTime’s Wage Codes. Nothing on this grid is required for VeriTime to function.
This grid displays each leave reason available in Aesop and allows you to link that leave reason to a Wage Code. Each reason must be linked to a Wage Code. If no code is specified, the system will use the wage code MISC_LEAVE for all absences.
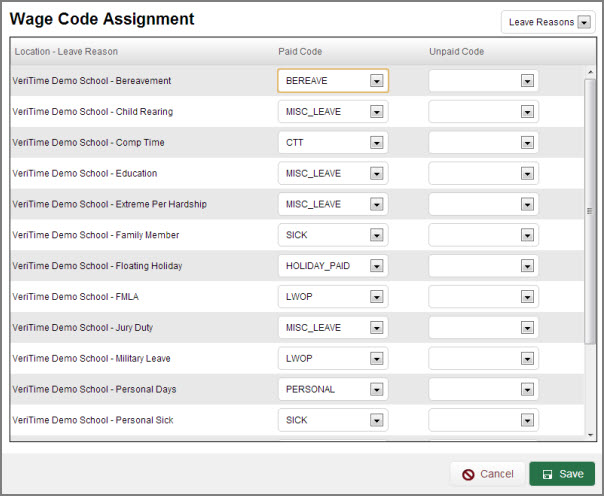
When you are finished making changes click the green Save button at the bottom of the page.
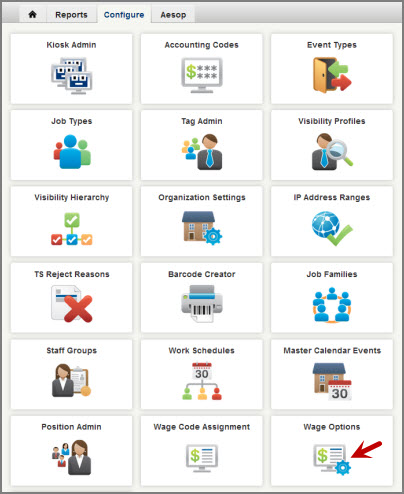
The Wage Option is a tool that allows VeriTime to associate a user to a specific pay rate, based on job type, pay range and seniority step. The pay rate type can be hourly, monthly or a fixed stipend.
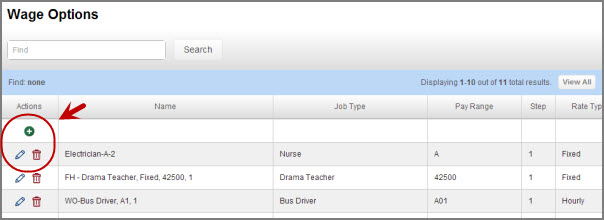
To access the Wage Option page, click on the Configure tab on your VeriTime home page and then click Wage Options.
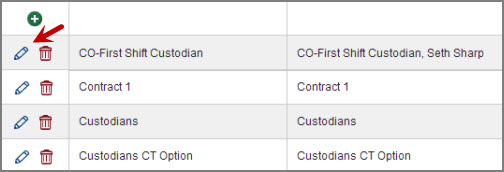
To add a new Wage Option click the green “+” icon at the top of the list. To edit an existing one, click the pencil icon. To delete one click the trash can icon.
When you click the + icon VeriTime will open a wizard to create the new Wage Option. In step one you will Name the Wage Option. We recommend when naming a Wage Option, use terminology that is easy to understand and reference. Include Job Type, Pay Range and Step as part of the naming convention.
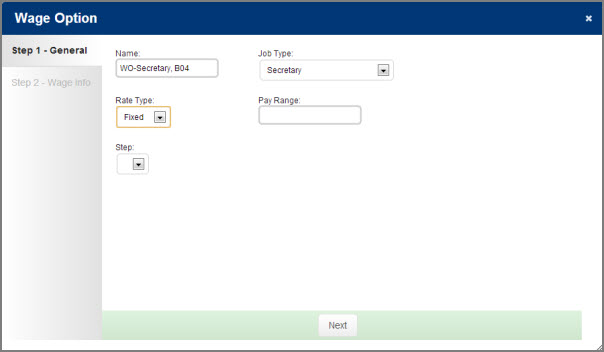
Job Type - Choose which Job Type this Wage Option will be associated to.
Rate Type - Choose Fixed, Hourly, or Monthly for this Wage Option's Rate Type.
Step - Assign a Seniority Step to this Wage Option if needed.
When you are ready to move on to step 2 click the Next button.
Step 2 of the Wage Options wizard is optional. It allows you to assign custom codes and apply pay rates to different Wage Codes.
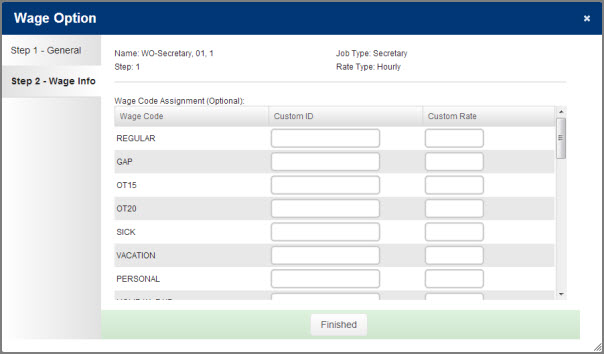
Note: One or more users can be assigned the same Wage Option definition. One or more Wage Options can be assigned to a user, but only one Wage Option per job type can be assigned to a user. Thus, a user cannot have multiple pay rates for the same job type assigned to them.
Click the Finished button to complete the wizard and create your new Wage Option.
A Job Family is a collection of related job types. In the Job Family section of VeriTime you will be able to create a list of Job Families that Staff Groups and Job Types can be associated to.
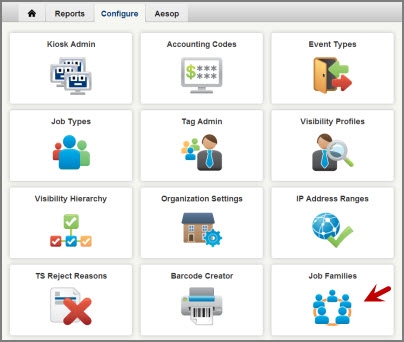
From your VeriTime home page click the Configure tab and then click Job Families.
To add a new Job Family click the green “+” icon at the top of the list. To edit an existing one, click the pencil icon. To delete one click the trash can icon.
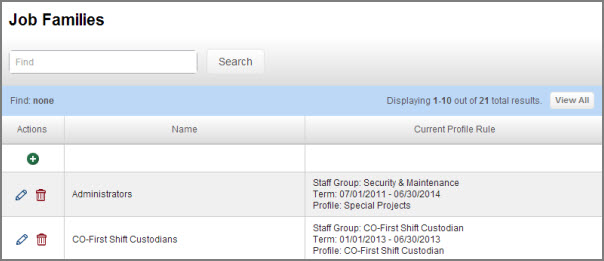
When adding a Job Family you are just creating the name. You will be able to associate Staff Groups and Job Types to Job Families in those sections of the website.
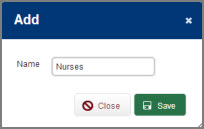
Click the Save button to save your Job Family, then click Close to close the pop-up window.
The Staff Groups page allows you to build configurations that match the collective bargaining agreements that your district has with different bargaining units.
Click here for a video on Staff Groups
Each Staff Group has effective dates and one or more “profiles”. Each profile represents a difference in payroll expectations within a contract.
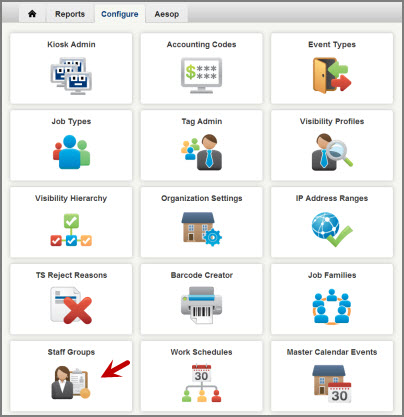
To access the Staff Groups page click the Configure tab and then click Staff Groups.
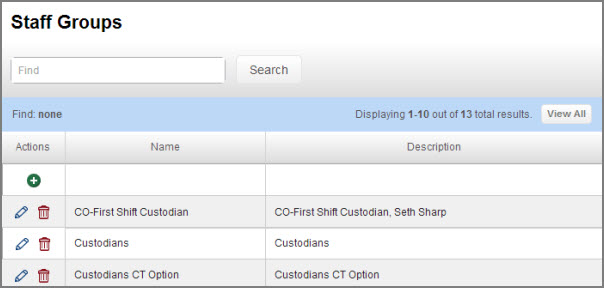
To add a new Staff Group click the green “+” icon at the top of the list. To edit an existing one, click the pencil icon. To delete one click the trash can icon.
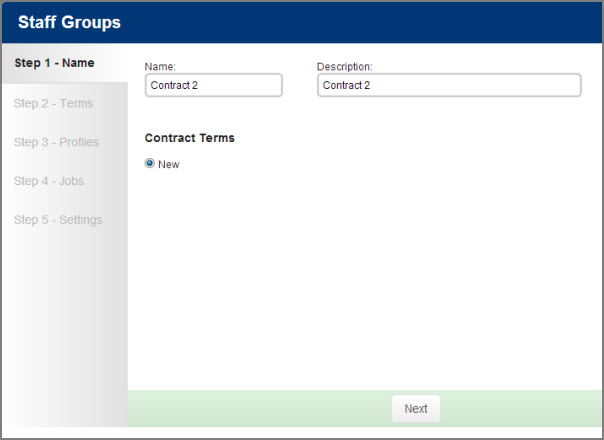
When you start the process of creating a new Staff Group you will be taken to a wizard that will walk you through the creation process.
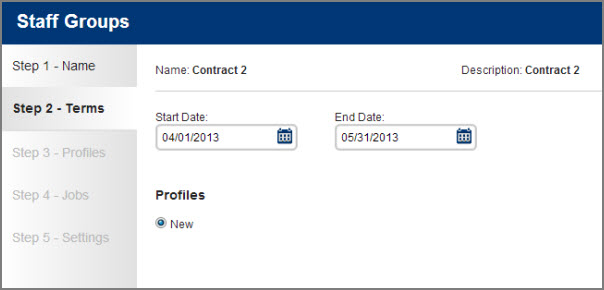
Name the Staff Group. When naming Staff Groups we recommend using terminology that is easy to reference and is reflective of your districts employee policies or labor contracts.
Click the Next button to move to the next step.
Set the effective date for the contract. Click the Next button to move on to the next step.
Within each contract you may have sub-groups with different rules. You can create a profile for each sub-group.
Name the profile a name that makes sense for the group that the profile will apply to.
Establish the rounding rule for all the users that fall in this Staff Group profile.
Next set the Rules. Check the box next to the rule you want to select and then click the Add Selected text. This will move the rule into the Assigned box. When you add a rule there may be additional info you have to enter for that rule.
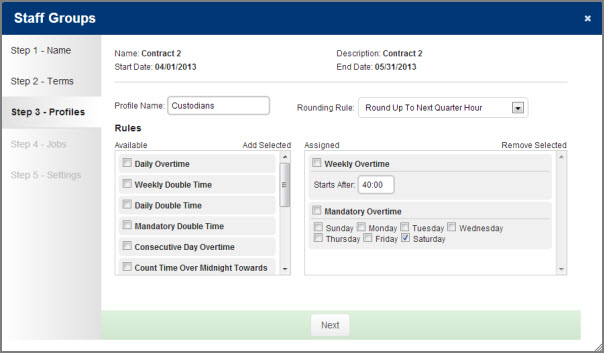
Click Next to move to the next step.
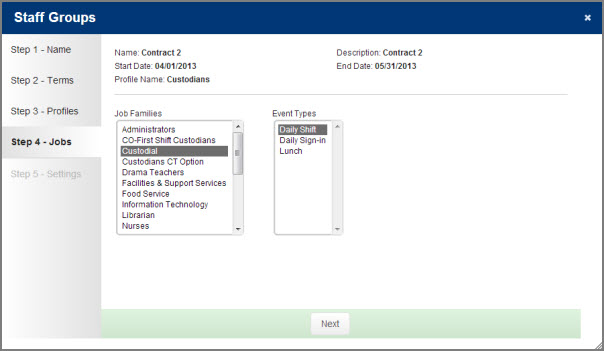
Select the Job Families that are within the Staff Group and which Event Types they are allowed to use.
On this step you will establish for the profile within this Staff Group which Absence Reasons for them are paid. Also establish if time for that absence reason should count toward the overtime calculation for the week.
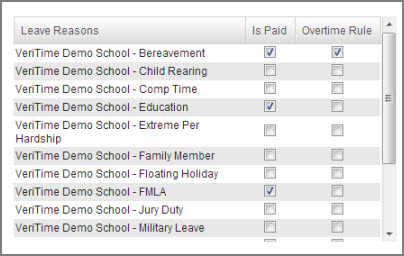
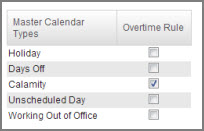
Then establish which types of events on the Master Calendar will count toward overtime.
When you are finished click the Final button to create the Staff Group.
Once your Staff Group is created you can edit it at any time to make changes or to add new profiles to it. Just click the pencil icon to go into edit mode.
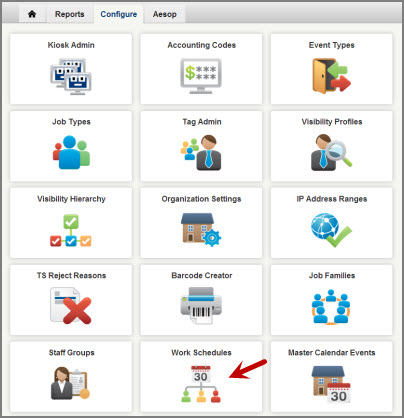
On the Work Schedules page you can set up generic work schedules for groups of users. To access this page click the Work Schedules option under the Configure tab.
To add a new Work Schedule click the green “+” icon at the top of the list. To edit an existing one, click the pencil icon. To delete one click the trash can icon.
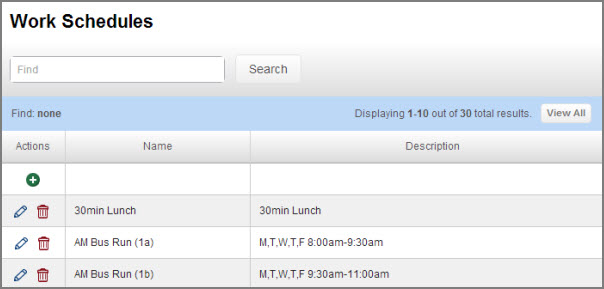
Note: When naming a work schedule, create a name that is easy to understand and reference when viewing the list of Work Schedules. (Days of week, Schedule time/Break time).
The following is a recommended example:
Or
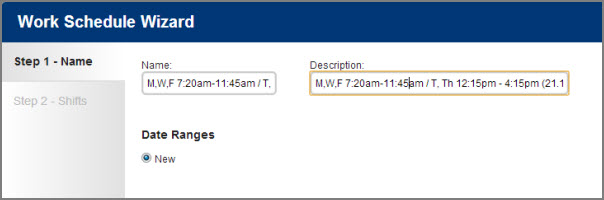
Click the Next button to move onto the next step.
On this step you will choose the effective date range for the work schedule.

Below the dates you can create the schedule. It can be a very simple schedule like the same hours everyday....

Or it can be more complicated where there are different hours depending on the day of the week....
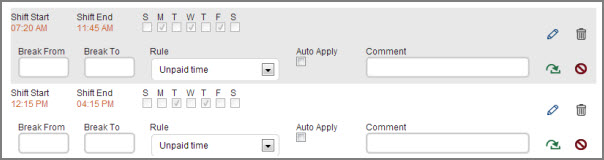
You can add multiple lines to a schedule as long as the times don't overlap. To add a line to the schedule click the green arrow icon. This will save your current line and add a new blank one. You can also use the pencil icon to edit a line, the trash can icon to delete a line and the red cancel icon to cancel a line.
Once you have finished entering the schedule click the Finish button to save.
The Master Calendar is a collection of date/time physical events that apply to school districts activities, but also effect user’s schedules and how employees might get paid. The Master Calendar is a tool that allows an administrator to apply these events to a group of employees based on location and/or Job Family.
Click here for a video on the Master Calendar
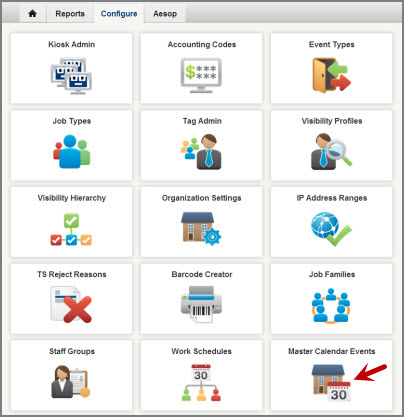
To access the Master Calendar Events page click that option under the Configure tab.
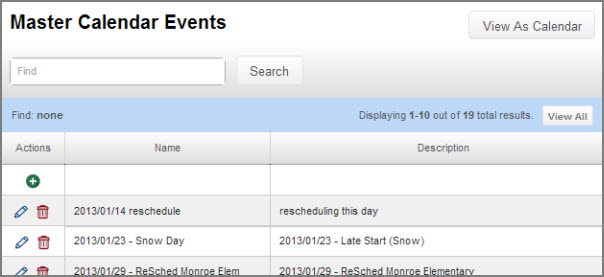
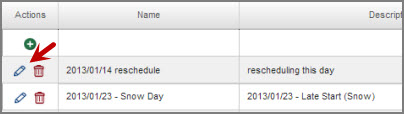
To add a new Master Calendar event click the green “+” icon at the top of the list. To edit an existing one, click the pencil icon. To delete one click the trash can icon.
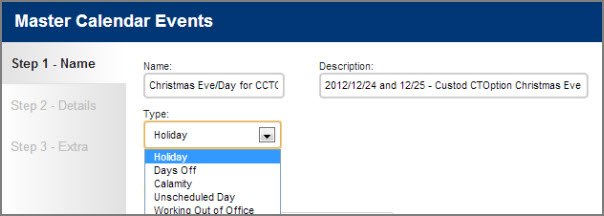
When creating a new Master Calendar event the first step is to name the event and choose what type of event it is.
Note: When naming a calendar event, create a name that is easy to understand and reference when viewing the list of calendar events. Include specific information that will let you easily identify what the event is for and what it does.
Click the Next button to move to the next step.
On the details page you will add the date and time duration of the event.
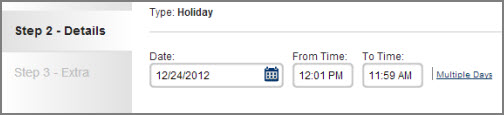
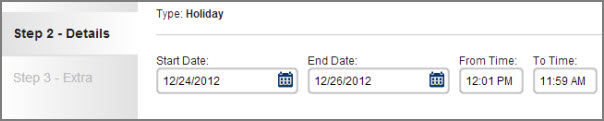
*Note: If the event is multiple days you can click the Multiple Days link and you will be allowed to put in a start date and an end date.
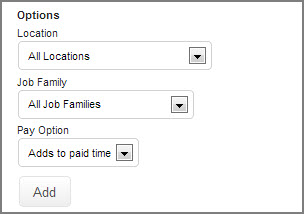
You can also add a location, job family, and/or pay option that apply to this event. When you fill these out click the Add button to move them to the Existing column.
*Note - The Pay Option field will not show up if you are using the "Working Out Of Office" or "Unscheduled Day" types.
When you have finished adding option click the Next button to move on.
On the next page click Final to save the Master Calendar event.
Once you have saved an event you can always go back to it in the listing and add more days or edit the options. Click the pencil icon to edit an existing event.
In the top right corner of the Master Calendar Events page you will see a button that says "View as Calendar." Click this button to be taken to a calendar view of the events you have created.
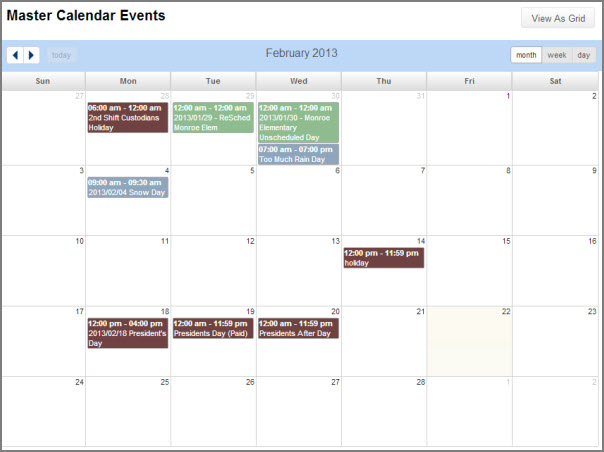
The events will be color coded according to this legend.

Event Types define the shift or parts of a shift for which employees may track time. You may have several Event Types available, and then choose from those for each employee, depending on how you want them to track time.
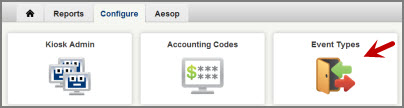
From your VeriTime home page click the Configure tab and then click Event Types.
There are many ways to customize Event Types to meet your needs using the parameters described below.
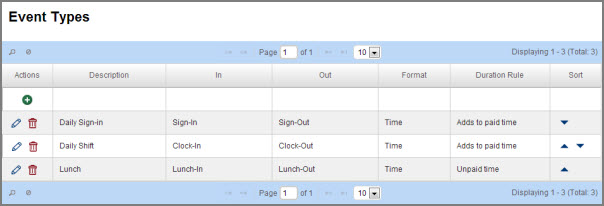
To add a new Event Type, click the green “+” icon at the top of the list. To edit an existing one, click the pencil icon. Click the Save button to save your changes, then click Close to close the pop-up window.
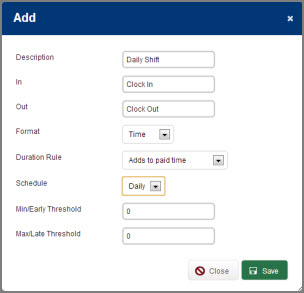
Description – This is the label that employees will see on the web clock and timesheet if you use a “Duration” format as described below.
In & Out – These are the labels that employees will see on the web clock and timesheet if you use a “Time” format as described below.
Format – This determines how you want time for this Event Type to be captured.
• Time: Captures the time of day for both the start and end times (duration can be determined from these times)
• Duration: Captures the duration (it doesn’t matter what the start/end times were, only the elapsed time – how much time the employee spent on this Event Type)
Duration Rule – Determines what to do with the duration of this Event Type.
Adds to paid time – Will add the duration of this Event Type to the total duration for the employee for that day. Note: This should be used for the Event Types that will add to a user's paid time.
Does not affect paid time – Durations for this Event Type will have no effect on the employee’s total duration for that day. E.g. paid breaks would use this option.
Unpaid time – Durations for this Event Type are subtracted from the total duration for the employee for that day. E.g. unpaid lunch breaks would use this option.
Schedule – Links this Event Type to part of the employee’s Aesop schedule. There are two “schedules” on employee records in Aesop, and each may be used only once in the entire list of Event Types. (Without being tied to a schedule, an Event Type cannot have early/late exception reporting.)
Daily – This is defined as the Start and End Times on the employee’s Aesop profile
Break – This is defined as the Half-Day Break Times on the employee’s Aesop profile
Early & Late Thresholds – If an Event Type is tied to a schedule, these values allow you to define what would constitute an early or late exception relative to the scheduled time.
Sort – This is the last column on the Event Types page. Use the up/down arrows to determine the order in which the Event Types will display for the employees.
Job Types allow employees to track their time against specific types of jobs, and you can report on the hours spent at each job separately. For example, if an employee may log time as both a Bus Driver and a Teacher Assistant, you can allow him/her to track the times and/or hours spent for each individual job during the course of the day.
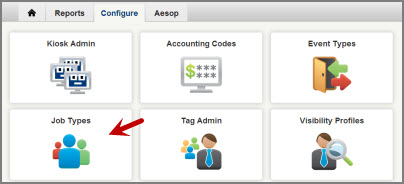
To access Job Types click the Configure tab on the VeriTime home page and then click Job Types.
To add a new Job Type, click the + icon at the top of the list. To edit an existing one, click the pencil icon. Click the Save button to save your changes, then click Close to close the pop-up window.
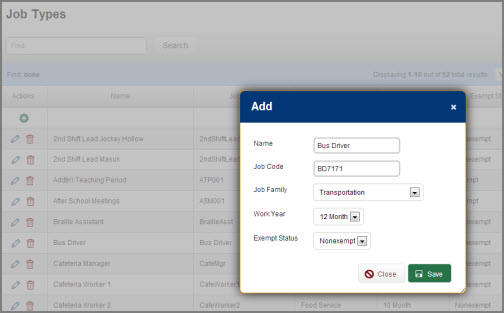
Name – This is the label that employees will see on the web clock and timesheet for this Job Type.
Job Code – Use this field to enter an accounting or budget code for this Job Type. This will be useful when you are importing hours for this Job Type into payroll.
Job Family - Pick which Job Family this Job Type will fall under.
Work Year - Here you can choose from a predefined list of work year periods of time. Choose the one that fits the Job Type you are creating.
Exempt/Nonexempt - Choose if
this Job Type is entitled to overtime pay or not.
Nonexempt - Employees are entitled to overtime pay.
Exempt - Employee are not entitled to overtime pay.
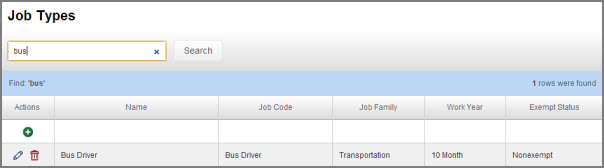
Use the filter and Find box at the top to search for a specific Job Type you have already created. you can enter words or partial words to narrow down the results.
Setting up accounting codes in VeriTime allows you to assign a specific accounting code to an employee's Job Type. These fields can be reported on in Report Writer.
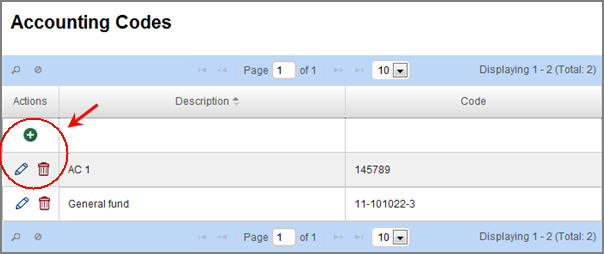
To create or edit accounting codes click the Accounting Codes option in the VeriTime menu under the Configure tab.

To add a new accounting code click the plus sign icon. To edit an existing one, click the pencil icon. To delete a row, click the garbage can icon.
When you click the plus sign icon you will get a overlay screen which allows you to enter the accounting code information.
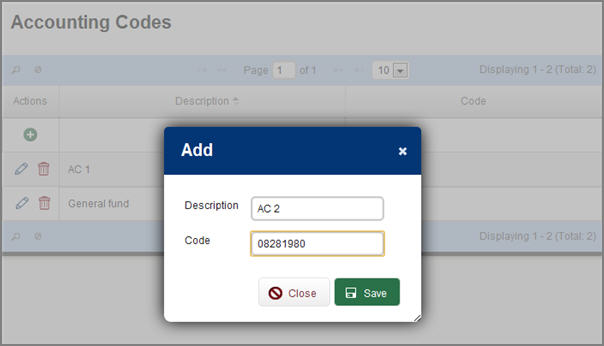
Description - Enter the description of the Accounting Code.
Code - Enter the actual code.
To save the Accounting Code click the Save Button. Click the Close button to close the box.
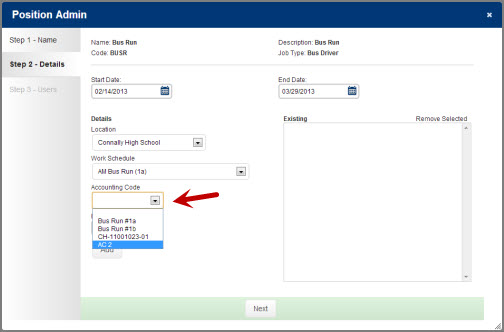
Once you have created Accounting Codes you can assign them to a Position during Step 2 of the Position Admin setup.
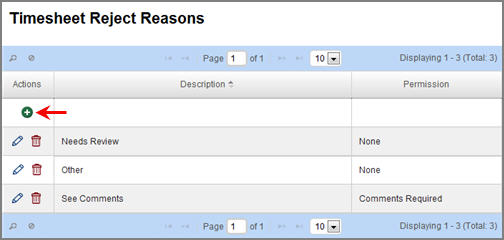
When users are reviewing timesheets they will have the ability to reject a timesheet. You can set up a list of reasons for them to choose from when they reject.
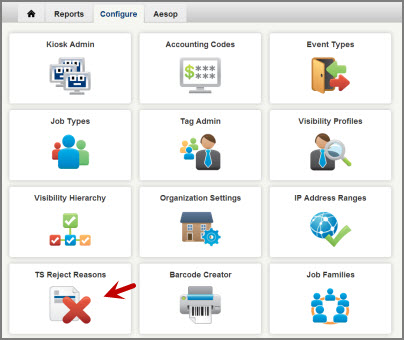
To set up this list click on TS Reject Reasons under the Configure tab on your VeriTime home page.
Edit an existing reason by clicking the pencil icon. Delete an existing reason by clicking the trash can icon. To add a new reject reason click the + icon in the Actions column.
Enter a description for the reject reason and decide if comments are required. Click Save to save it to your list of reject reasons.
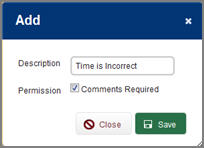
Once your Reject Reason is saved it will be available to users when they reject a timesheet in Timesheet Review.