You can change the settings and visibility of the various Admins (Campus Users and Org Users) in VeriTime. To access these setting click the Administrators option under the Configure tab.
Choose the Admin
On the Administrators page you will see a list of all of your Org Users and Campus Users who are in VeriTime. You can search for a specific user by using the search box at the top of the page. To edit an admin’s settings click the pencil icon in front of their name.

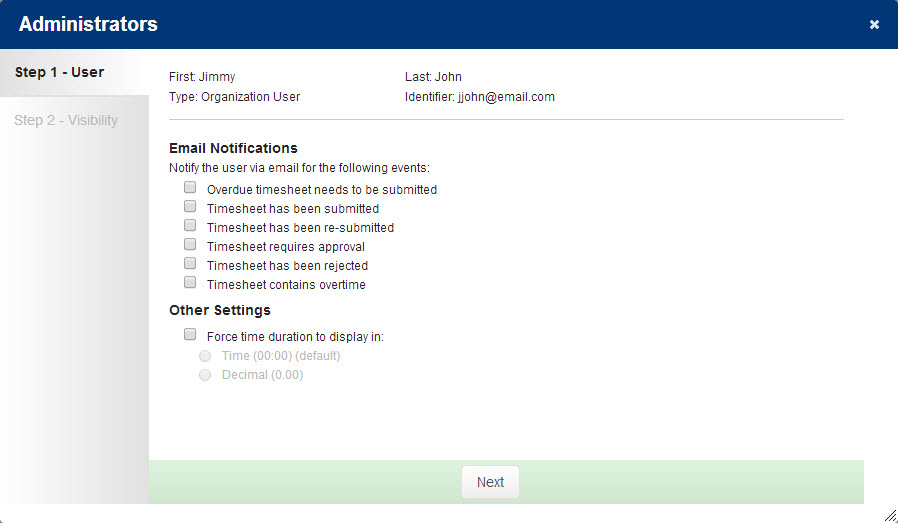
Step 1: User
In this step you will choose which email notifications you want the admin to receive. Simply check the box for each notification type you would like them to receive.
Also choose if you want to override the default setting for the way the User’s time is displayed.
Click the Next button to move on to the next step.
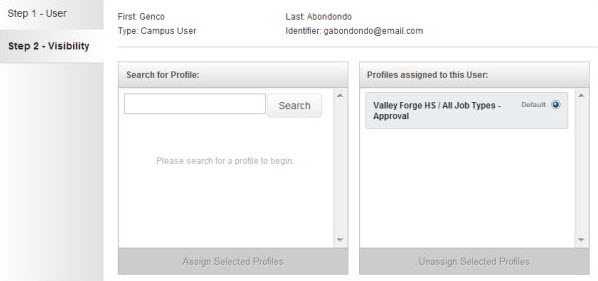
Step 2: Visibility
In this step you can assign the Visibility Profiles to the Campus User. The Visibility Profiles will control which users the admin can see and approve for.
You will see two boxes on this page.
- Search for Profile: This is where you can search for and select profiles to assign to the admin.
- Profiles assigned to this User: This is where any profiles already assigned to the admin will be.
To add a new profile to the admin begin by searching for it by name in the search box. Partial search terms work.
When you find the profile you are looking for click on it to select it. More than one profile can be selected at a time. When a profile is selected it will turn yellow.
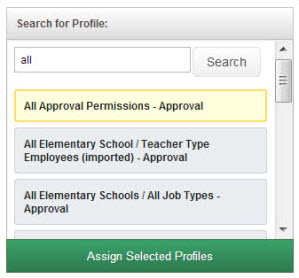
Once you have selected the correct profile/profiles click the Assign Selected Profiles button to move them to the assigned box.
You can also remove an assigned profile by selecting it and clicking the Unassign Selected Profiles button.
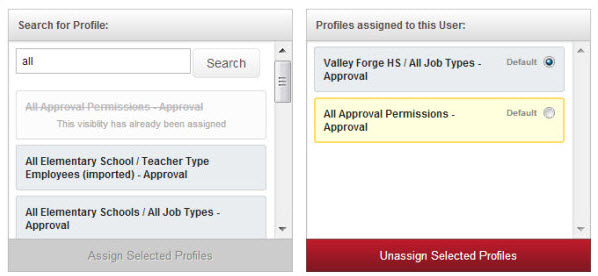
Choose a Default Profile
If you assign more than one profile to an admin you will need to choose a default profile. The default profile will be the visibility settings that VeriTime will default to when the admin is viewing things like the Timesheet Review. They will have the ability to toggle between visibility profiles when needed. Use the radio button seen in the above screenshot to choose which profile will be the default.
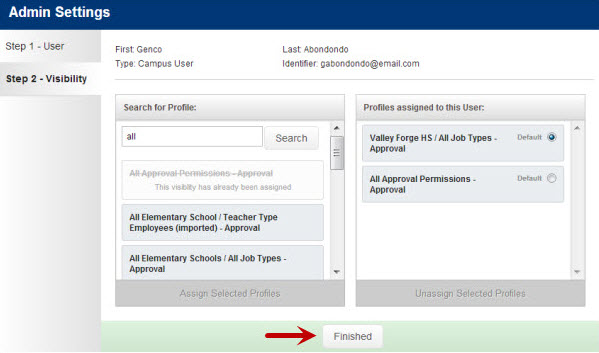
Once you are satisfied with the profile setup, click the Finished button to save the settings.
