Note: Depending on your permissions setup you may not have access to all the functions you see here.
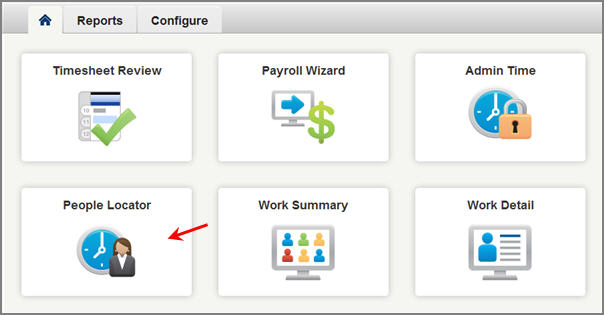
To access the People Locator click that option from the VeriTime home page.
The People Locator is designed to give you a snapshot of where everyone is in real-time for the current day. The key to learning this information is to focus on the Status column on the right. It will tell you the last clock event for someone.
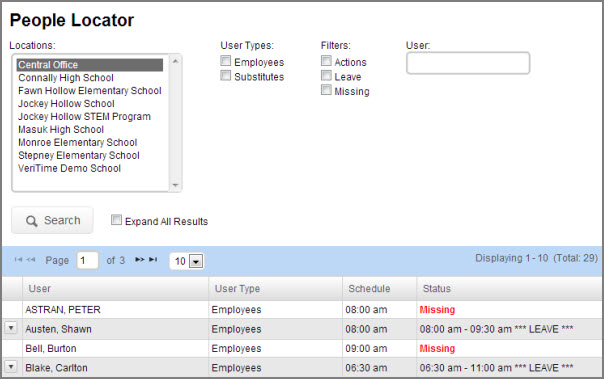
Use the various filters at the top of the report to specify the info you are looking for.
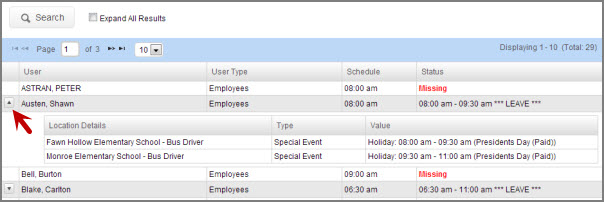
Click the arrow left of the name to see any details that are available.
There are four possible statuses.
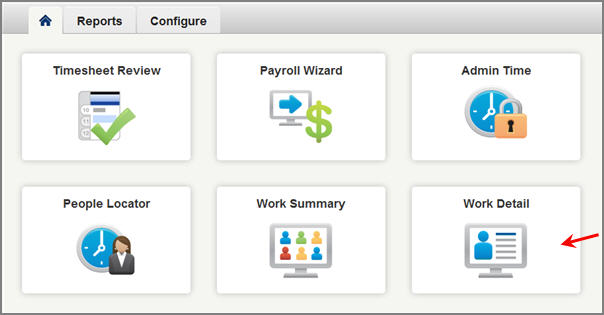
The Work Detail report provides low level information about users for a given time period. The data is broken down by work week, then day, then location/job type combination.
To access the Work Detail report click on the Work Detail link from the VeriTime home page or under the Reports tab.
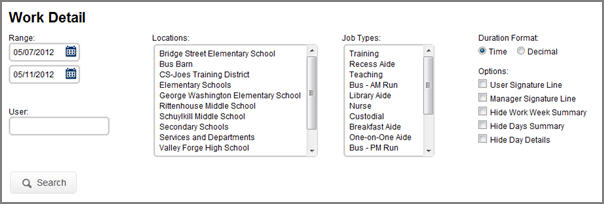
At the top of the report there are a number of filter options including date range and location. You can search for the employee by typing their name in the User box and clicking the Search button.
The image below shows the body of the report. The Schedule link next to the name will take you to the employee's schedule. The Payroll link will take you to the Payroll Summary.
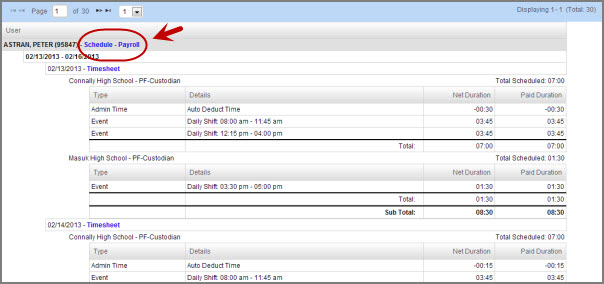
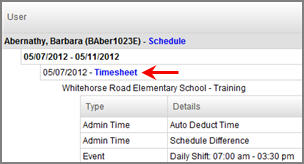
Click on the Timesheet link in the report to view the employee's timesheet.
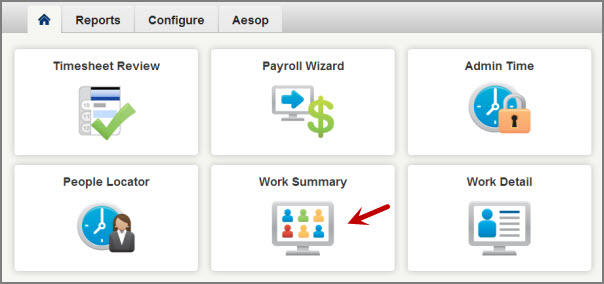
The Work Summary report provides high level information about users for a given time period. By default the data is broken down by date range but can be further broken down into the following: Day, Work Week, Location, and Job Type.
To access the Work Summary report click on the Work Summary link from the VeriTime home page or under the Reports tab.
At the top of the report you can set a date range, filter options, and choose which columns you want included in the report.
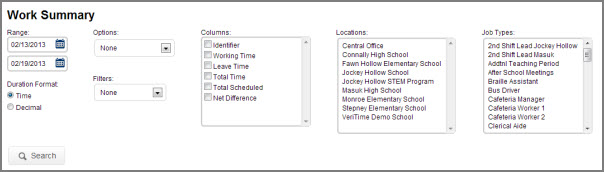
Options - The Options dropdown lets you choose how to group information in your report. For example if you choose "Day" the info in the report will be grouped by individual date.
Filters
Net Difference - This filter only returns users with a net difference (excludes zeros).
Users With Time - This filter returns only users with time (total time).
To apply options and filters click the Search button.
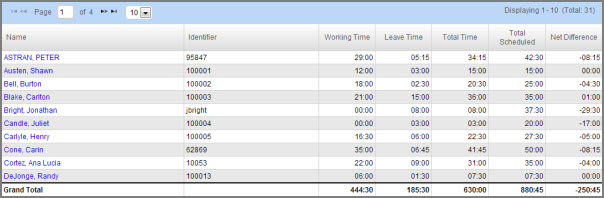
The report itself shows a summary of the data for your employees. By clicking on the employee's name you can access their Work Detail report.
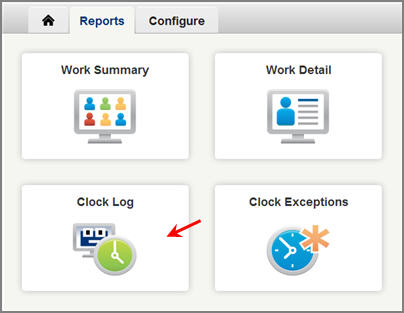
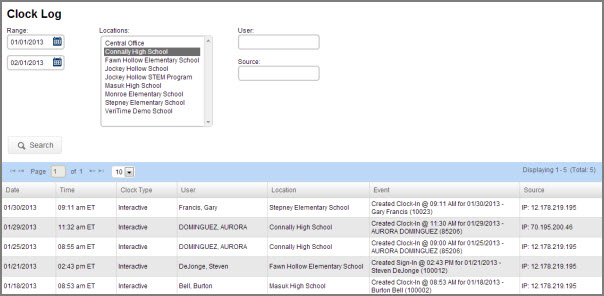
The Clock Log is a simple report that shows you all Clock activity, but Clock activity only. It can be a convenient place to see what is happening at your clock kiosks.
To access the Clock Log click on the Clock Log link from the VeriTime home page under the Reports tab.
The Clock Log will give you all the information about what transpired at each clock event. The Clock Type will show you if it was Interactive (the user used the keyboard & mouse to enter time) or Scanner (the user used the barcode scanner to perform the clock event).
You can filter this report by date range, location, user, and source.
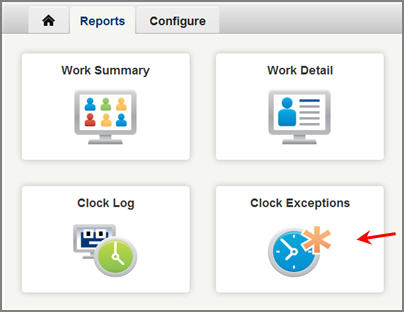
The Clock Exceptions report is a quick way for you to look for any kind of Clock Exceptions, such as late clock-in, missed punch, etc.
To access the Clock Exceptions report click on the Clock Exceptions option from the VeriTime home page under the Reports tab.
At the top of this report you can select a date range, location, and mark the exceptions you want to see. You can also enter a specific user's name. When you click Search, those preferences will be saved, becoming your default selections the next time you pull it up on that computer.
Note: You can select multiple locations by holding the Ctrl key while clicking on the location names.
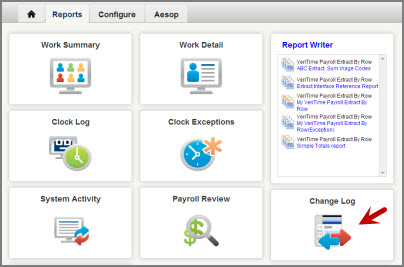
The Change Log will track any changes made to Time Clocks and Timesheets and show the details of the changes.
To access the Change Log click on the Change Log option from the VeriTime home page under the Reports tab.
At the top of the change log you can set what date range you want the log to run for.

Log Date - The exact date and time of the change.
Category - This column will show what type of change was made.
Location - Shows what location this change is associated to.
Job Type - Shows which Job Type is associated to the change.
Description - The details of the change.
Source - This column will show the IP address of the device used to make the change or the name that has been assigned to that IP address.
Changed By - Shows the name of the person who make the change or if the change was system generated.
OS - This will display the operating system for desktop/laptop computers and display the name of the device for tablets and smartphones.
Browser - This will display the name of the browser performing the action.
Geolocation - This will display the latitude and longitude recorded for the mobile device performing the action.
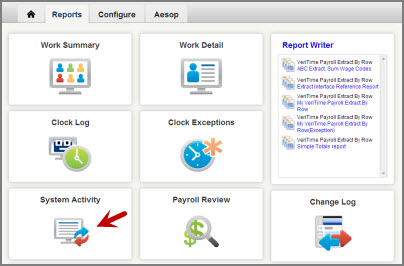
The System Activity Page displays the last 50 background processes that ran in VeriTime sorted by the most recent update.
To access System Activity click on the System Activity option from the VeriTime home page under the Reports tab.
The report will show the date of the activity, what the specific activity was, the status of the activity, who initiated the activity, and the exact run time.
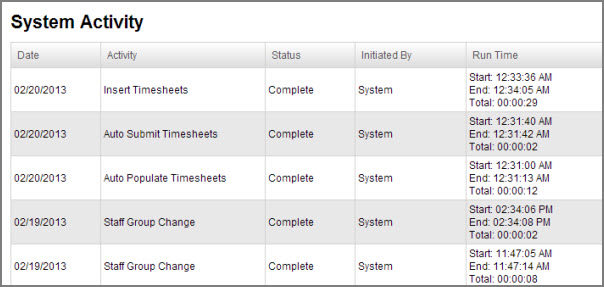
The different processes that the System Activity report will show are as follows:
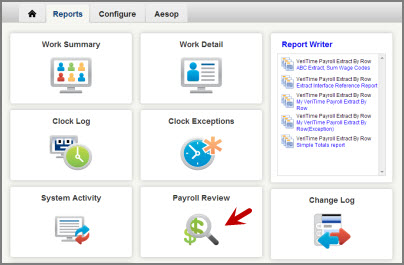
The Payroll Review report shows all the different types of wages an employee will receive for a given date range. The default date range is 14 days.
To access the report click on the Payroll Review option from the VeriTime home page under the Reports tab.
At the top of the report you can filter the results by User Type, Job Type, and Wage Code. You can also change the display format to show time or decimal.
The results of the report will show all the wage codes applied to an employee for the date range given. It will also show the Wage Duration and Total Duration.
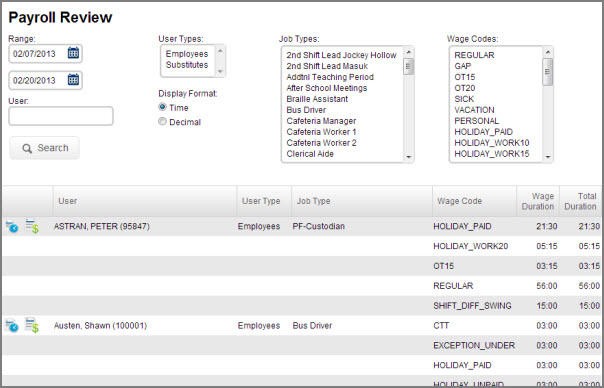
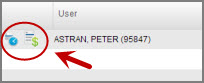
Next to the employee's name in the report you will see the Timesheet (the one with the clock) and the Payroll Summary (the one with the dollar sign) icons. You can click on these icon to be taken to the Timesheet or Payroll Summary for that employee.
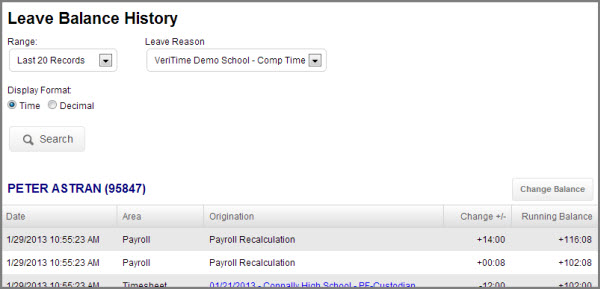
The Leave Balance Summary page displays the leave balances being tracked by VeriTime. This page will not function unless your organization is using Comp Time. Once the Comp Time Taken (CTT) wage code is assigned to a leave reason, this page will display the balances for all users for that specific leave reason.
To access the report click on the Leave Balance Summary option from the VeriTime home page under the Reports tab.
For now, this report only tracks Comp Time but in the future will track other types of leave. At the top of the report you can change the display format from Time to Decimal. You can search by a specific user name as well as filter by a minimum and maximum balance.
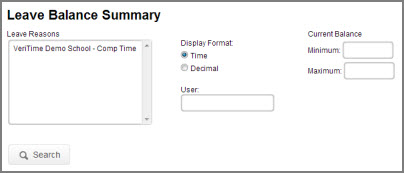
In the body of the report you will see the user's current balance of Comp Time in the far right column.
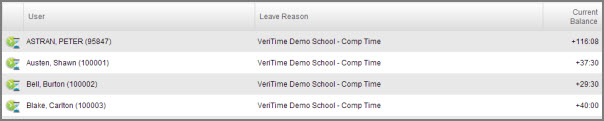
To the left of the user's name their is an icon for Leave Balance History. Click the icon to open the report. The Leave Balance History page displays all historical changes that have been applied to a balance. The last 20 records are shown by default but you can search for a custom date range up to 36 days. For each row, the grid displays information about what made the change and displays a running balance.
You will also see a Change Balance button in the Leave Balance History report.
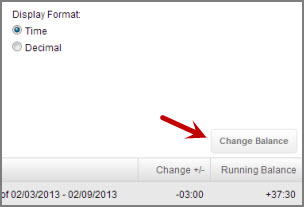
Clicking this button will bring up a pop-up where you can adjust the balance for a user and leave a reason for the adjustment. Adjusting the balance in VeriTime will effect their balance in Aesop if one exists.
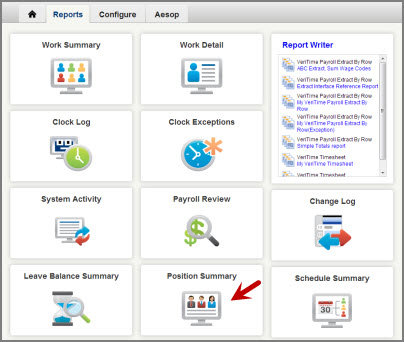
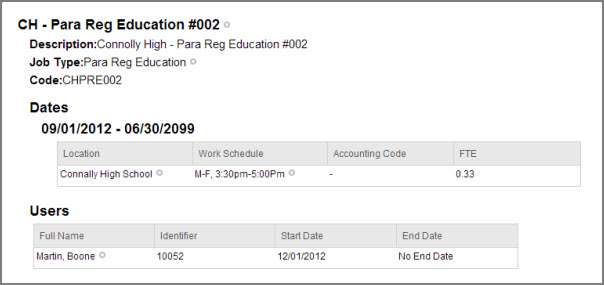
The Position Summary Report will show all details about a position including who is assigned and when. To access the report click on the Position Summary option from the VeriTime home page under the Reports tab.
At the top of the report you can filter by date range, position name, position code, location, and job type. Click the Search button to apply the filters.
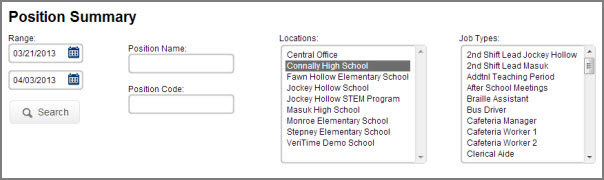
The body of the report will show a list of all positions that match your filter criteria. It will show the name and description of the position, the job type it is associated to, and the code. It will also show if date ranges have been applied to the position and which users are assigned to this position.
The Schedule Summary report will show the work schedule(s) for a user. This allows you to view schedule overlaps, monitor multiple job situations and identify employees who are over certain benefit thresholds.
To access the report click on the Schedule Summary option from the VeriTime home page under the Reports tab.
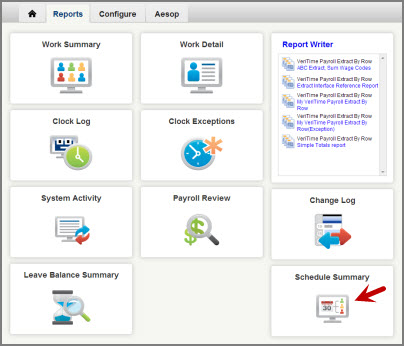
At the top of the report you can filter by date range, locations, job types, and user types. You can also change the display format between time and decimal. Click the Search button to apply the filters.

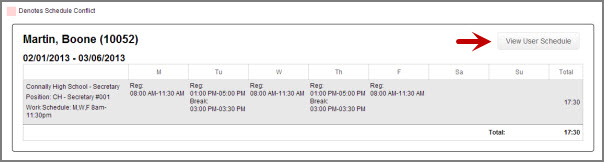
In the body of the report you will see the user's schedule summary for the date range you specified. Any conflicts will be marked in pink. To view the user's full schedule click the View User Schedule button.
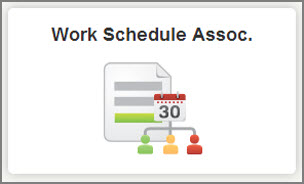
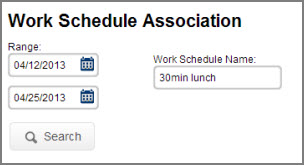
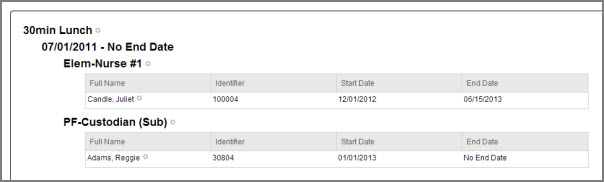
The Work Schedule Association Report will show you which users are associated to a Work Schedule. Access the report by clicking the Work Schedule Assoc. option under the Reports tab.
At the top of the report you can choose a date range to run the report for. You can also filter by a specific Work Schedule name.
The body of the report will show you all users who are associated to that Work Schedule in that date range.
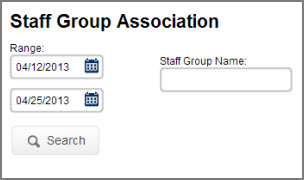
The Staff Group Association Report allows you to see all the Staff Group profiles and the users associated to those profiles. This will help you verify that users are assigned to the appropriate profiles and therefore assigned to the proper payroll rules.
To access the report click the Staff Group Assoc. option under the Reports tab.
At the top of the report you can filter by a particular date range. You can also filter by a specific Staff Group name.
Click the Search button to run the report.
The body of the report will show you all the Staff Group profiles that are associated with that date range and all users who are associated with that profile.
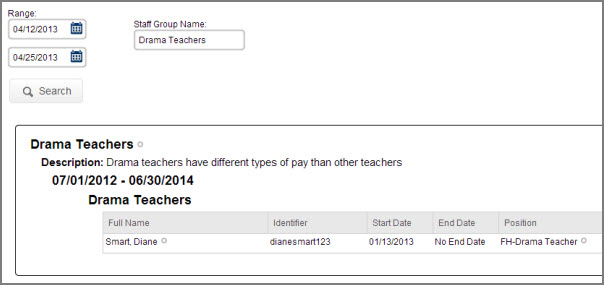
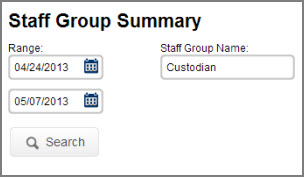
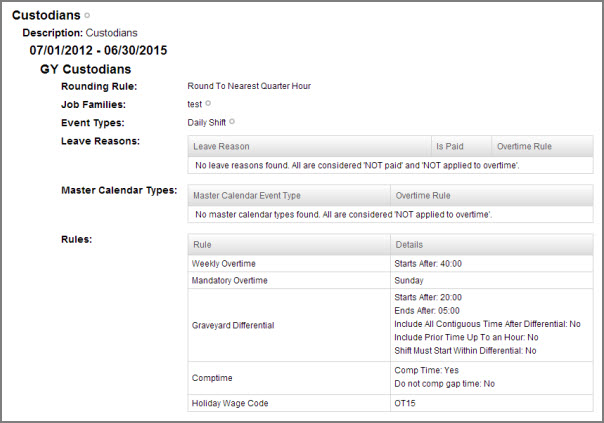
The Staff Group Summary Report shows you all of your Staff Groups and all of the details of each Staff Group Profile including the Rounding Rule, included Job Families, included Event Types, Leave Reason and Master Calendar Event pay behavior, and Pay Rules/Options.
To access the report click the Staff Group Summary option under the Reports tab.
At the top of the report you can filter by a particular date range. You can also filter by a specific Staff Group name.
Click the Search button to run the report.
The body of the report will look like this.
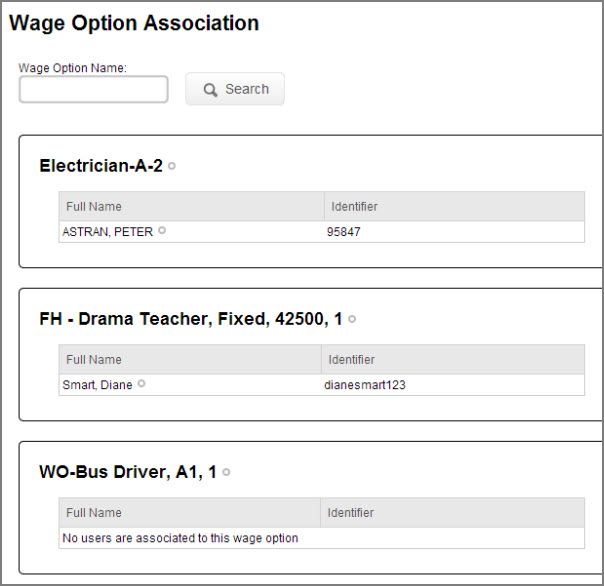
If your district is using the Wage Option feature this report allows you to view all users and the Wage Options they are associated to.
To access the report click the Wage Option Assoc. option under the Reports tab.
When the report first comes up it will show all of your Wage Options in alphabetical order. The names of the users associated to the Wage Option will be listed under the Wage Option.
At the top of the report you can filter by specific Wage Option by typing it into the box and clicking Search.
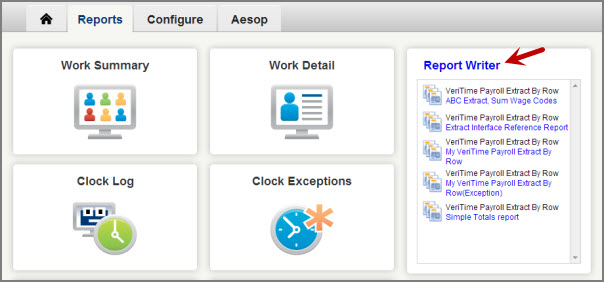
On the VeriTime home page under the Reports tab there is a section called Report Writer. This section will show a list of all of your available Report Writer reports. Click on the name of the report you want to view and the report will open in Aesop.