Any employee or substitute who is on Aesop may be a VeriTime user. They login with their Aesop ID and PIN and access their VeriTime features through that portal and/or through the web clock.
All of your VeriTime user settings can be accessed through the User Settings page. To access this page click the User Settings option under the Configure tab.
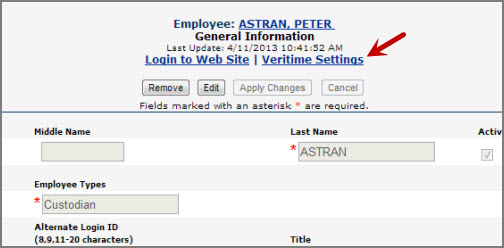
You can also access a user's settings by clicking the VeriTime Settings link on the user's Aesop General Information page.
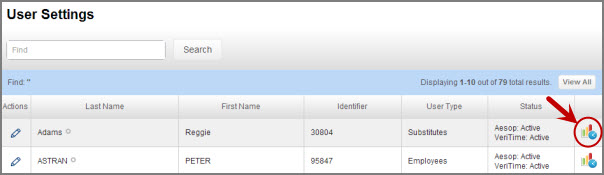
You can search for a specific user by typing data into the search box found at the top of the page. You can search by first or last name or by Identifier. You can even search using partial data.
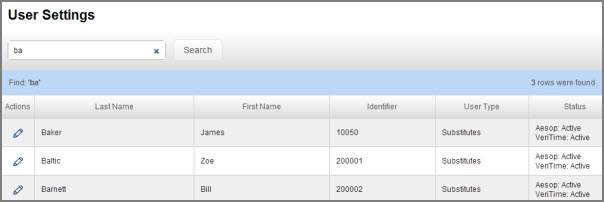
To edit a user's settings click the pencil icon in front of their name. This will open the window where you can change any of their settings across two steps.
Note: You can also access a specific user's settings by clicking the Veritime Settings link on their Aesop General Information page.

At the very top of this page you will see a check-box indicating if this user is currently active in VeriTime. Uncheck this box to make the user inactive. If a user is inactive time clocks and timesheets will not be generated for the user. The user will also not be able to access any VeriTime features.
In the Setting section you will see two columns, Available and Assigned. The Available column shows all the setting that are available to be assigned to the user. The Assigned column shows all of the settings that have already been assigned to the user.
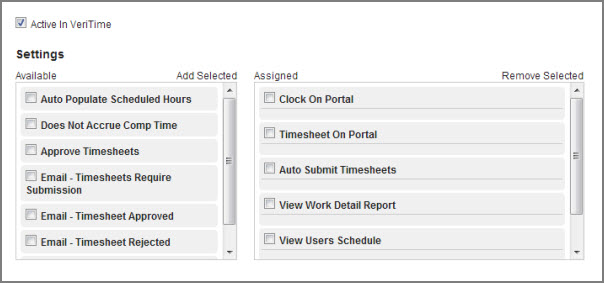
To add an available setting to the Assigned column, check the box next to the setting and then click the Add Selected text.

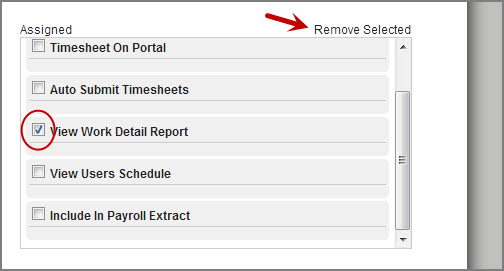
To remove an assigned setting to the Available column, check the box next to the setting and then click the Remove Selected text.
Here is a list of the settings you can choose from:
Auto Submit Timesheet – This will automatically submit a user's timesheet on a two day rolling basis. For example, time entered on 5/5 would automatically be submitted at 12:01AM on 5/7. You might use this option if the person will mainly use the Web Clock, but you want the time to go through the approval workflow and/or be available in timesheet reports. (Recommended for Web Clock Only users.)
Auto-Populate Scheduled Hours – Use this option if you want the user’s scheduled start & end times to be automatically populated into the timesheet. In this scenario, the user would only need to change times that were different than scheduled and submit the timesheet.
Does Not Accrue Comp Time - Choose this option if you do not want the user to accrue Comp Time.
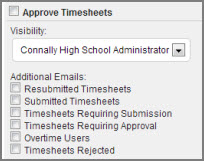
Approve Timesheets - This option will allow this user to approve other user's timesheets. You will have additional options when this setting is assigned. You will be able to choose the user's approval visibility as well as additional emails they can receive.
Email - Timesheets Require Submission - An email will be sent to the user letting them know that there is a timesheet that is past the due date that needs to be submitted.
Email - Timesheet Approved - When a user's timesheet has been approved an email will be sent to that user.
Email - Timesheet Rejected - When a user's timesheet is rejected an email will be sent to that user.
Email - Overtime Crossed - An email will be sent to the user nightly if the user's hours have crossed into overtime or double time on the previous day.
Clock On Portal – Allows the launching of the web clock from within the user’s Aesop portal (you can control via IP Address configuration if necessary)
Timesheet On Portal – This will allow the user to access their own timesheet from the Aesop portal. They can also edit times if they can access their own timesheet, so keep that in mind.
View Work Detail Report - Choosing this setting will allow the user to view the work detail report.
View Users Schedule - Choosing this option will allow the user to view their own schedule.
Include in Payroll Extract – Check if you want to include this person in any of the Report Writer Payroll templates. (Recommended.)
View Leave Balance Summary - This will allow the user to access their hourly Comp Time balance within VeriTime.
Here is where you can assign Wage Options to this specific user.
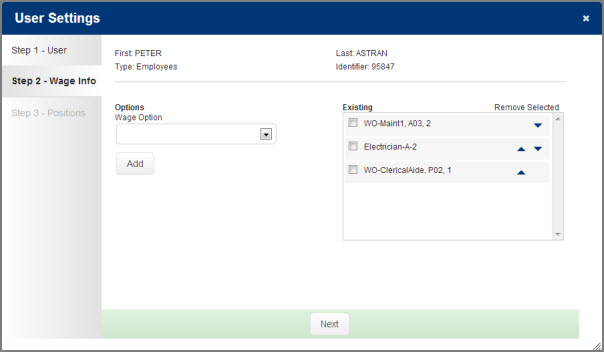
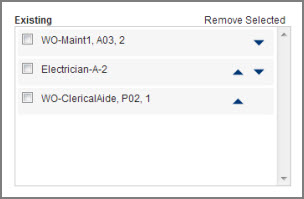
To add a Wage Option choose it from the drop-down list and click the Add button. This will put the Wage Option into the Existing column.
Once Wage Options are in the Existing column they can be set in priority order by using the blue up and down arrows.
Remove a Wage Option by checking the box next to it and then clicking the Remove Selected text.
Click the Next button to move on to the next step.
This step allows you to search for a Tag and assign it to a User. Simply enter a search term in the search box and click the Search button. This will bring up a list of all the matching Tags. Click the appropriate Tag name to select the Tag (you can select more than one if needed). Next click the Assign Selected Tags button to assign them to the User.
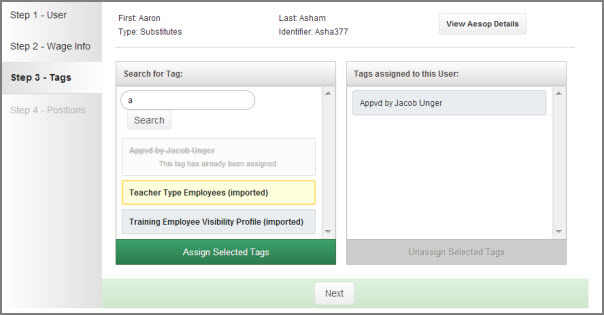
You can also remove a Tag from a User by selecting it in the Tags Assigned to this User column and then clicking the Unassign Selected Tags button.
When you have finished making your changes click the Next button to move to the next step.
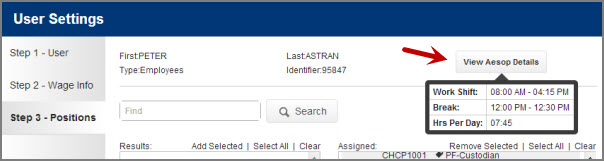
Note: You can reference the user's Aesop details in this step by clicking the View Aesop Details button. You will get a pop-up showing their work shift, break times, and hours per day from Aesop.
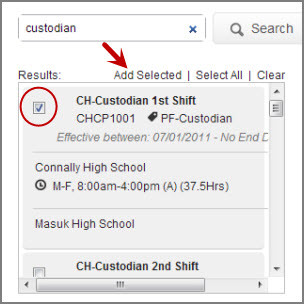
In this step you can assign a position or positions to the user. Use the search box to search for the position you are looking for.
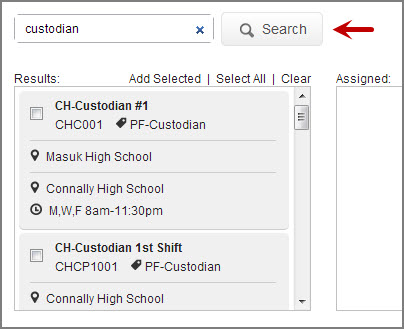
Mark the position you want to assign with a check and then click the Add Selected option.
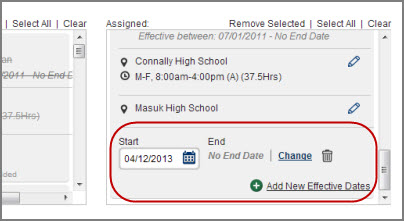
This will move the position to the Assigned column. Once in the Assigned column you can change the effective dates for the position. To change an effective date click the Change option. To delete effective dates click the trash can icon. To add new effective dates click the Add New Effective Dates option.
You can also change the location, job, and accounting code by clicking the pencil icon associated to that information.
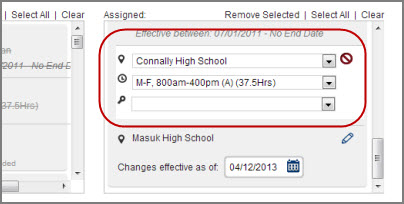
You can continue to add more positions as necessary by repeating the above steps.
When finished click the Finished button to save the settings for the user.
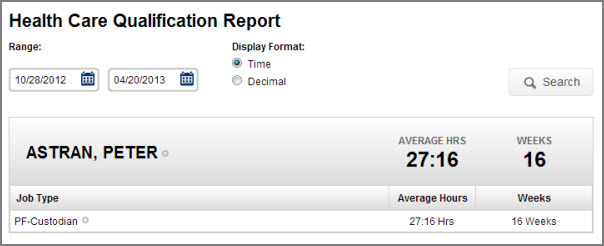
The Affordable Care Act (ACA) states that employees that work an average of 30 hours a week are eligible for health benefits. The Health Care Qualification Report will help you quickly view what a user's average hours are over period of time.
To view the report click the report icon at the end of the user's row in User Settings.
The report will show the average number of hours worked by the user you selected. You can change the date range and the display format (Time or Decimal) at the top of the report. Click the Search button to apply the filters.