Many school districts have days built into the school year to accommodate days that are closed due to weather or other calamities. While this is often adequate, there are times that you will overrun these extra days which results in Saturday School, days tacked on to the end of the year, or holidays/breaks that will now be in-session days. VeriTime has a tool built for this purpose. It is called the “Rescheduled Day”.
What is a Rescheduled Day? A Rescheduled Day is a day you want to schedule for your employees that is outside of their normal schedule, like a Saturday or a Holiday that is now going to be a school day, or a day that is past the end date of the school year. This process uses a past day’s schedule as a template and copies it to another day that will serve as the make-up day.
To create a Rescheduled Day, go to your VeriTime Home tab and look for the Master Calendar button.
If it is not there, you can also find it on the Configure tab.

Clicking on either of these buttons will take you to a list of all of your Master Calendar list. Select an existing Master Calendar Event to which you would like to add this Rescheduled Day, or add a new Master Calendar Event. If you do not have any Rescheduled Days created in your district, you will need to create a new Master Calendar Event.
![]()
When you start a new Master Calendar Event, you will be taken into the Master Calendar wizard. On step 1, enter the Name of this Event. For this example, this new Master Calendar Event will be called “2013/2014 Rescheduled Days”. Enter a Description if you desire. In the “Type” drop-down menu, select “Rescheduled Day”. The Dates section will be pre-selected to create a new date.
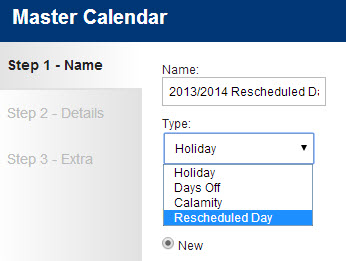
Click the “Next” button that is at the bottom of the wizard window in which you are creating this Event.

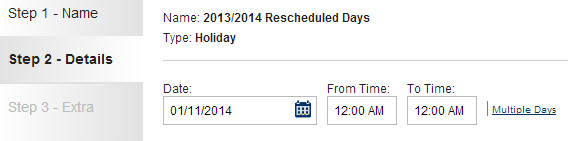
On Step 2 of the wizard, enter the date of the make-up day that you want to schedule and the time range that needs to be rescheduled. The times are typically going to be 12:00 AM to 12:00 AM unless you have a shift of workers that should be specifically excluded from this event.
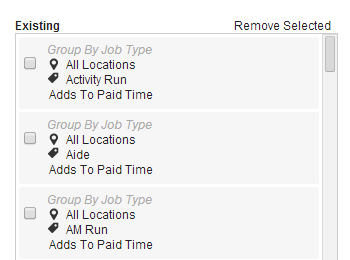
Then select the locations and Job Types, and/or Users who need to have this new scheduled day. In this example, the list is being constructed based upon the Job Types that people work.
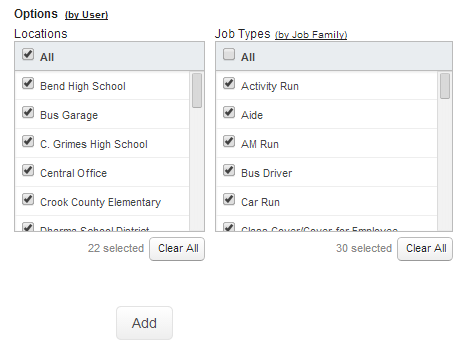
Once your selections are complete, click the Add button (shown in the above screenshot). A list will be created on the right-hand side of the screen showing you who will be affected.
When you have completed creating your list, click Next.
On Step 3 of the wizard, you will be asked to select the date from which you want to create this Rescheduled Day. Typically, you are selecting the day of school that was canceled due to weather or other calamity as the template for which you are creating this newly scheduled make-up day.

Now click the Final button to complete your request.
![]()
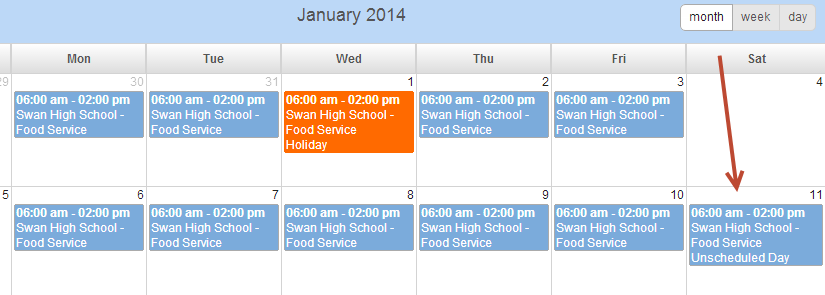
To verify that your request processed properly, select an employee that you know should have been affected by this rescheduled day and look at their schedule for the Rescheduled Day date; the make-up day.
In this example, 12/10/2013 is being rescheduled for Saturday, 1/11/2014.
Congratulations, you successfully created a Rescheduled Day!
