Report Writer can be used for anything from generating timesheet data to creating a very specific report. It is an extremely easy to use tool that will save you a great deal of time and effort.
To access report writer, simply click the Reports tab on your VeriTime home page. Then, click the icon of the report you would like to run. You can also build custom reports by navigating to the “Custom” section near the bottom of the page.
Report Writer Basics
Report Types
There are a number of report types you can create in Report Writer. Choosing the correct report type is the first step in building a new report. Here’s an overview of the types of reports:
- Work Summary - This report will show you the time worked, time scheduled, and leave time
- Work Detail – View event type, detail and duration of time worked.
- Payroll Review – View wage type and duration for a user by date-range.
- Schedule Summary – View and monitor schedules.
- Clock Exceptions – View late clock-ins, missed punches, overtime, etc.
- Leave Balance – View comp time balances.
- Clock Log – View all clock kiosk activity.
- ACA Healthcare – View the average hours of users for a given time period.
- System Activity – View system/user initiated changes and processes.
- Change log – View changes made to time clocks and timesheets.
Building a Custom Report
Sometimes, the pre-made reports won’t have everything you need. In that case, you can build your own custom report in Report Writer. To do this, you’ll need to access Report Writer in Aesop.
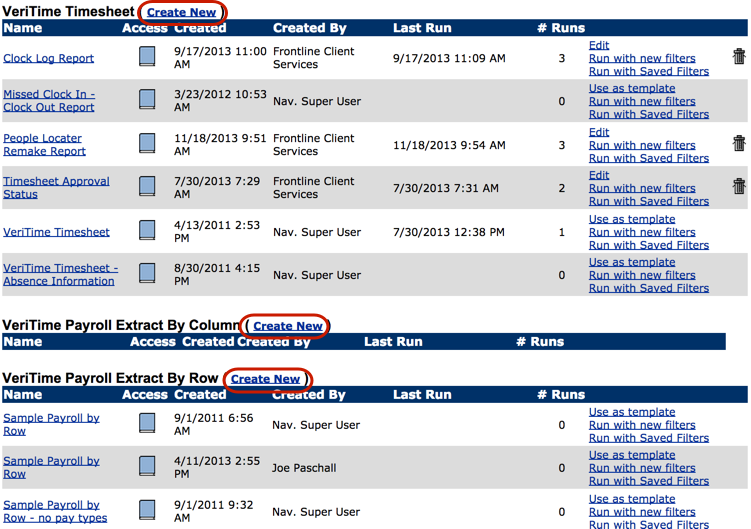
To begin, first navigate to the “Custom” section at the bottom of the “Reports” page. Here, you will see any existing custom reports. Now, click on the Report Writer link.

This will take you to Aesop’s “Report Selection” page. At the bottom of the page, you will find your VeriTime reports. Navigate to the type of report you want to create, and then click the Create New link beside the title.
Now you can start building your report. To add a field, click and drag it to the space under the “Report Fields” tab.
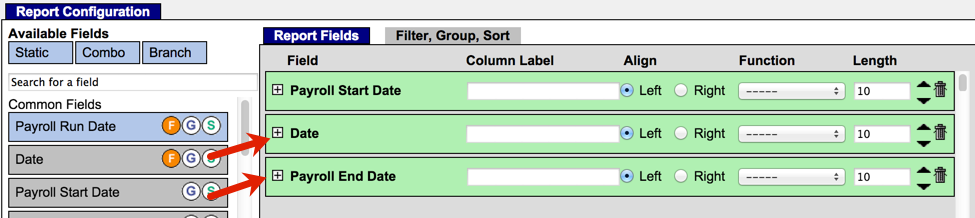
To add a filter, click the orange circled F of the field you want to select. To group, click the blue circled G. To sort, click the green circled S.

Once you are ready to run the report, click the Save & Run button. To save the report without running it, simply click the Save button.

The next page will give you options for exporting, scheduling, and distributing the report. Once you specify where, when, and how you want the report to go, click the Run button.
