In VeriTime you can set up Visibility for your Admin users which will control what users they are able to view and approve for in VeriTime. The process will involve creating Visibility Profiles and then assigning the profiles to your Admin users.
To access your visibility profiles click Visibility Profiles under the Configure tab on your VeriTime home page.
This will take you to the list of your Visibility Profiles in VeriTime. Here you can see the name, description, approval level, and the number of admins the profile is assigned to.
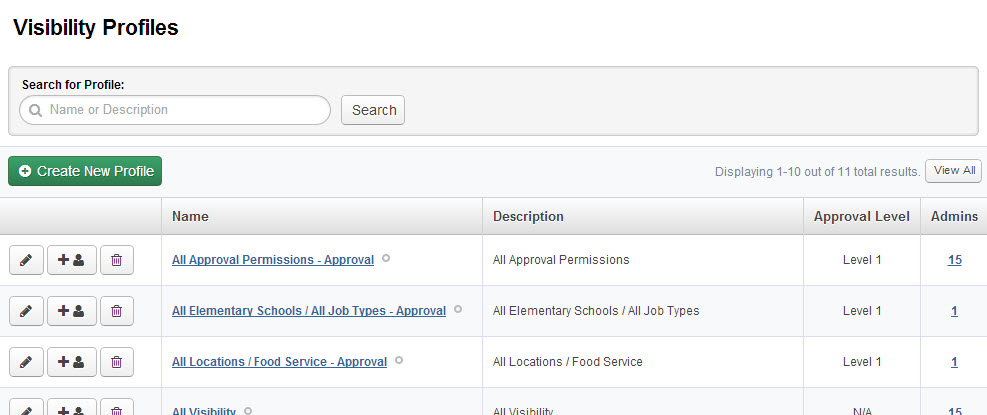
To assign a Visibility Profile to specific people, you can click the Assign Admins button (between the edit and delete buttons) in the left column.
To edit an existing profile click the pencil button
To delete a profile click the trash can button.
Creating a New Visibility Profile
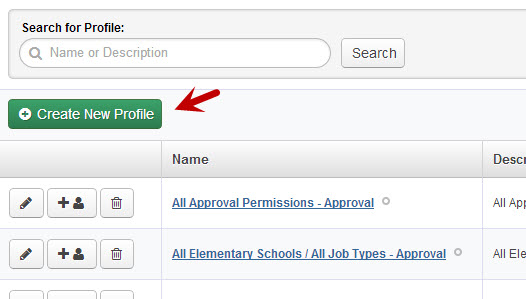
There may be a situation where you need to create a new visibility profile in VeriTime. To do this click the “Create New Profile” button.
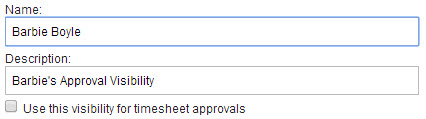
The first step is to name your visibility profile and give it a description. Make sure your name and description sets it apart. This will help you to know which profiles to assign to which people. Also, make sure to check the box if you want the Admin assigned this profile to be able to approve timesheets. This box may not appear if you use multiple levels of approval.
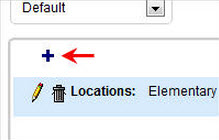
Next, click the + icon in the top left corner of the blank box. Or, if you’re editing a pre-existing profile, click the yellow pencil to edit the current set up.

This will open up the area to set up the first row of visibility. In most cases you will only need this first row.
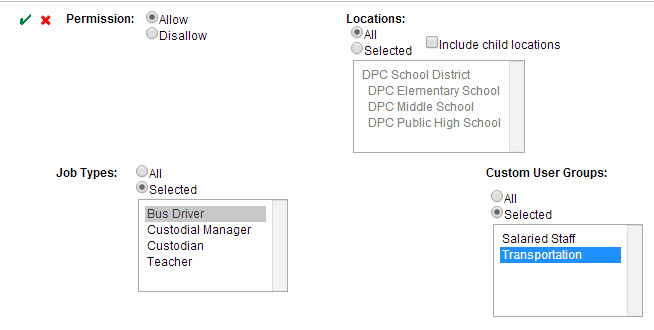
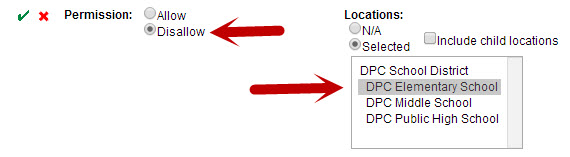
Permission
Mark as Allow if you want what is marked in this row of the visibility profile to be what the user will see.
Mark as Disallow if you want to exclude what is marked in this row of the visibility profile from what the user will see.
Note: Disallow always takes precedence over Allow.
Job Types
Leave this marked as All or change to Selected to choose individual Job Types for the visibility.
To select multiple Job Types in the list hold down the “Ctrl” key on your keyboard.
Locations
Leave this marked as All or change to Selected to choose individual locations.
To select multiple locations in the list hold down the “Ctrl” key on your keyboard.
Custom User Groups
Custom User Groups are groups of individuals that you have pre-created in the Custom User Groups section of VeriTime. (Learn more about Custom User Groups here.)
Leave this marked as All or change to Selected to choose individual Groups for the visibility.
To select multiple Groups in the list hold down the “Ctrl” key on your keyboard.
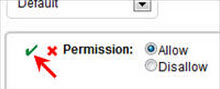
To save this row of the visibility profile click the green check mark at the top left of the page.
At this point you can go ahead and save the Visibility Profile by clicking the Save button at the bottom of the page or you can continue to create more rows for this visibility profile.
Adding Rows to the Visibility Profile
In the visibility profile you may have allowed visibility to what you want the Admin User to see but you also have something you want to disallow them from seeing, like a specific school. To do this you can add another row to the visibility profile.
Click the + again to add another row.
In our example we had given visibility for the user to see all Elementary Schools. By adding this row we can disallow visibility to just one of those schools by selecting Disallow and choosing the location we want to disallow visibility to.
Save this row by clicking the green check mark.
Now you can see the multiple rows that we have saved in this visibility profile.

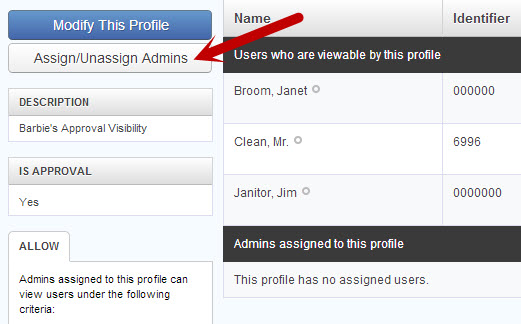
Once you click “Save,” you’ll be taken to this Visibility Profile’s Details screen, where you’ll see a summary of the profile, as well as the option to modify the profile or assign/unassign the profile to Admins.