User Templates will aid in User setup by ensuring that a User is given the appropriate system permissions without you having to remember which permissions to set or to look up another User’s settings for reference. These templates allows you to make a change that applies to all Users attached to a template instead of touching each user record individually. User Templates group Users for system permissions, email notices, and comp time accruals and deductions together so they can be set as a standardized selection for a Users who have common system needs. This reduces the amount of redundant work for Admins who can choose a single profile instead of selecting the same settings over and over again on individual Users.
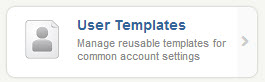
To access the User Templates click that option under the People Management section of the Configure tab.
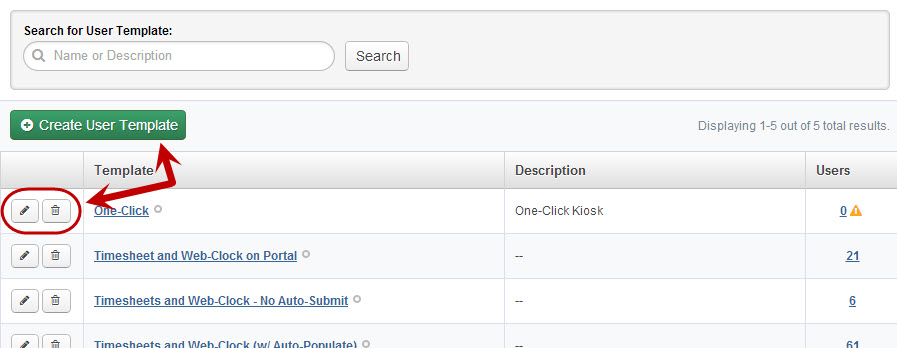
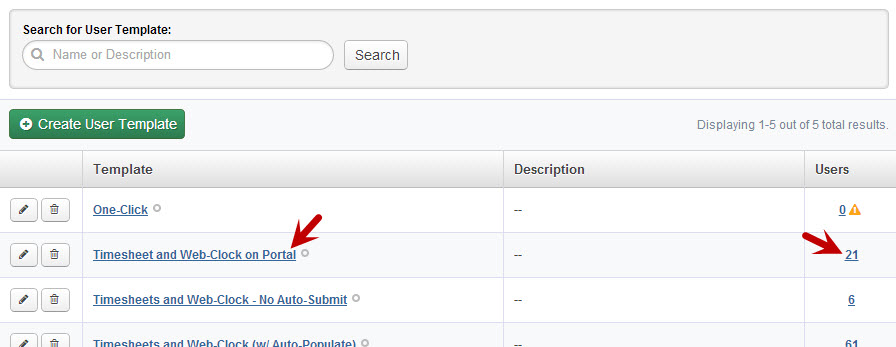
This will bring you to the list of User Templates that are available for your Organization.
To add a new User Template, click the green Create User Template button
To view or edit an existing User Template, click on the pencil icon to the left of the User Template name. To delete a Template click the trash can icon.
Clicking the Create or Edit button will open the User Template wizard.
Step One: Configure Settings
General
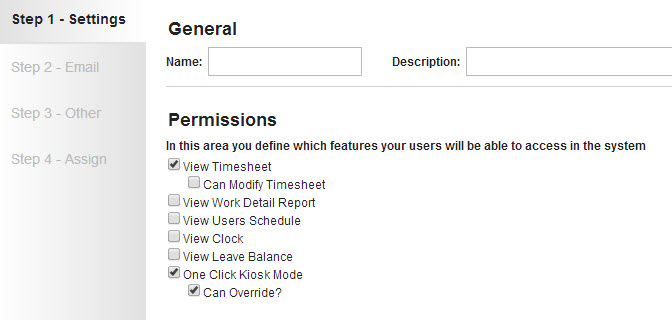
- Name - Enter a unique name for the User Template. Choose a name that is both meaningful and brief (i.e. “Teachers 1″).
- Description - Enter a longer description that explains the User Template further.
Here are a couple of examples:
- Name: Teacher 1, Description: Teacher Work Detail no Comp – for Teachers with access to View Work Detail Report and who Do Not Accrue Comp Time.
- Name: Teacher 2, Description: Teacher Timesheet Leave Balance Stop Auto Comp – for Teachers with access to their Timesheets, to View their Leave Balance, and who must enter an absence to use Comp Time rather than allowing the system to auto deduct from the Users balance.
Permissions
These setting will determine what the User will have access to in the system. Check the box next to the permission if you want the User to have that permission.
The permission options are:
- View Timesheet - Allows the user to access and edit their personal electronic timesheet on their VeriTime website. This option is not recommended for web clock/kiosk users. When this option is clicked a secondary permission is revealed, Can Modify Timesheet. Selecting this option will allow the employee or substitute to edit their own timesheet. Leaving this option unchecked will still allow the employee or substitute to view and submit time worked, but will not allow edits of any kind.
- View Work Detail Report - Allows the user to view their Work Detail report. (Recommended)
- View Users Schedule - Allows the user to view their schedule in a calendar display. (Recommended)
- View Clock - Allows the user to launch a personal clock kiosk from their own VeriTime website. If you are using this feature, consider using the “Enforce Kiosk IP Blocking” feature in the General Settings to keep users from using this feature outside of the workplace. (Learn how to set up an IP Address Safelist here.)
- View Leave Balance Summary - *This feature is currently solely for districts using the Comp Time feature in VeriTime* Allows the user to view their hourly Comp Time balance.
- One Click Kiosk Mode - Allows users that work multiple jobs in a day to be able to clock in for the morning and then clock out at night and have VeriTime automatically punch the user in and out for their various jobs for the day. This feature only works for users that have at least one schedule. This feature should not be used if the user has a schedule containing an Auto-apply break time.
- Can Override? - When a user that is using One Click Kiosk mode attempts to clock in on a day for which they do not have a schedule, VeriTime will block them from using the clock. This feature gives the employee a way to override One Click Kiosk mode so that they can enter times on days for which they were not scheduled.
When you have finished choosing the settings click the Next button to move onto the next step.
Step Two: Set up Email Options
In this step you will choose what types of emails you want the Users to receive.
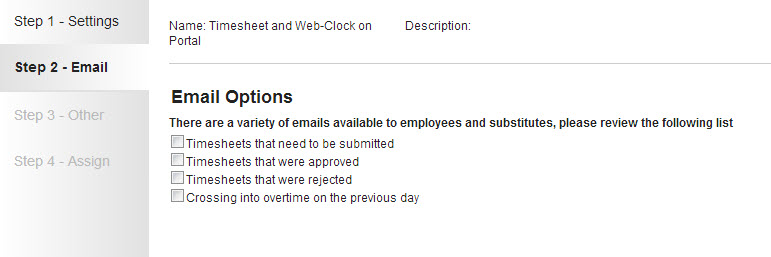
Email Options:
- Timesheets that need to be submitted - Weekly; Recommended only for Users who have access to their timesheets.
- Timesheets that were approved - As approvals occur
- Timesheets that were rejected - As rejections occur; Not recommended for Users who don’t have access to their timesheets, since they wouldn’t be able to edit rejected timesheets.
- Crossing into overtime on the previous day - As occurs
Check the box next to the email options you want the Users to receive.
When you have finished choosing the email options click the Next button to move to the next step.
Step Three: Other
In this last step you will choose from a handful of other settings available to the Users.
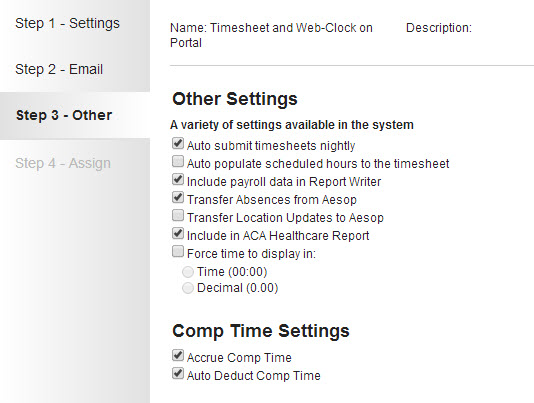
Mark the Settings that are appropriate for the User’s you will associate this profile to.
Other Settings:
- Auto submit timesheets nightly - Automatically submits Users’ timesheets nightly. Not recommended for timesheet Users, and not necessary for timesheet approval.
- Auto populate scheduled hours to the timesheet - Automatically applies Users’ scheduled hours to their timesheets the following midnight if no In/Out times were previously entered on that timesheet.
- Include payroll data in Report Writer - Enables you to pull these Users’ payroll information in Report Writer Reports.
- Transfer Absences from Aesop - Enables Users’ absences to transfer from Aesop to their VeriTime timesheets.
- Transfer Location Updates to Aesop – Enabling this will allow VeriTime to transfer Locations for employees to Aesop. Click here to learn more.
- Include in ACA Healthcare Report - Includes the User in the ACA Healthcare Report. Recommended for full time employees.
- Force time to display in – Forces the User’s time to show in Time (00:00) or Decimal (0.00) format.
Comp Time Settings:
- Does Not Accrue Comp Time - Disables Comp Time accrual for these Users.
- Stop Auto Comp Time Deduction - Disables the automatic deduction of Comp Time from these Users’ Leave Balance if they work under their scheduled hours in a week. Recommended for all Users using Comp Time.
Step 4 -Assign
On the last step of the wizard you can assign the template directly to the the User’s you would like the setting s and permissions to apply to.
In the left box you will be able to search for a User by name or identifier. Once you have found the User you can move them to the Assigned column by clicking the green “Assign Selected Users” button.
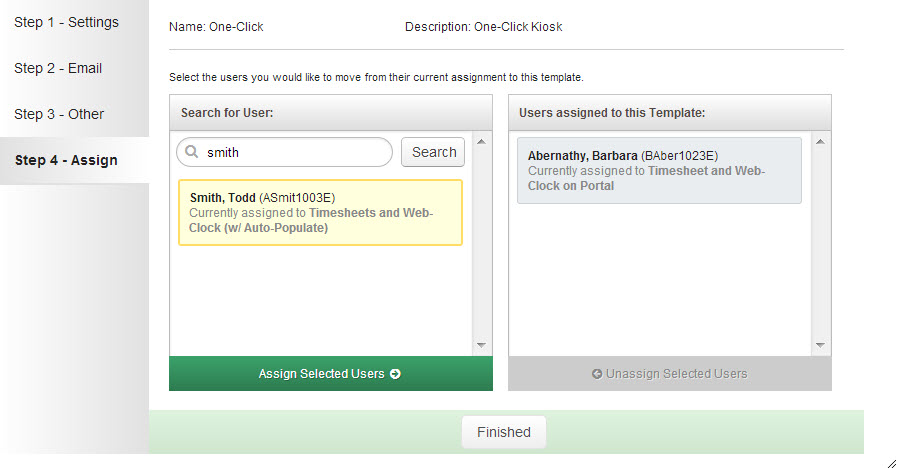
Continue to search for and add more Users as necessary.
Click the Finished button when you are ready to save the User Template. You can always come back and assign more Users to this template when needed.
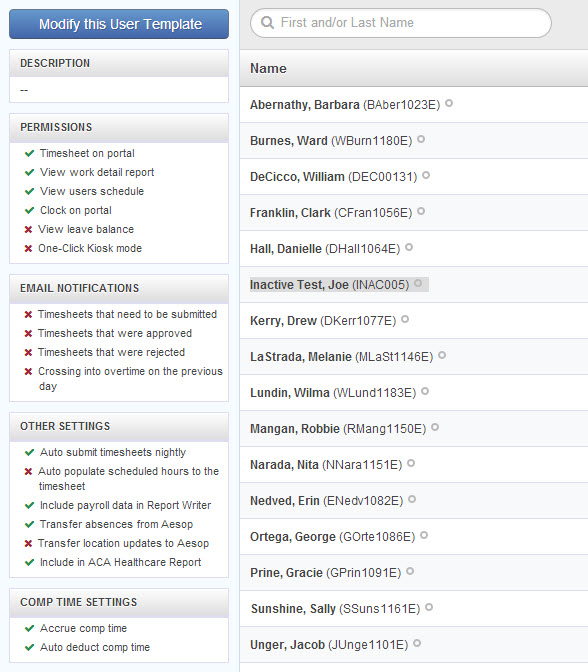
User Template Details Page
When viewing your list of User Templates you can click the name of a template or the number at the end of the row (the number indicates how many Users are associated to the template) to be taken to the Details Page. You will also be brought to this page when you complete the User Template wizard.
This page will display all of the Users associated with the User Template and which options are turned on within that template.