A Position is a defined role within a school district which reflects a Job Type and can reflect a default budgeted Location, Work Schedule, Default Account Code and one or more assigned Users. Multiple combinations of (Locations, Work Schedules, and Account Allocations) can be assigned to a Position definition as long as they do not overlap.
To access the Positions page click that option under the Configure tab.
This page will allow you to specify Positions to be worked within your district. Each Position is associated with a Job Type and has effective dates.
Position List
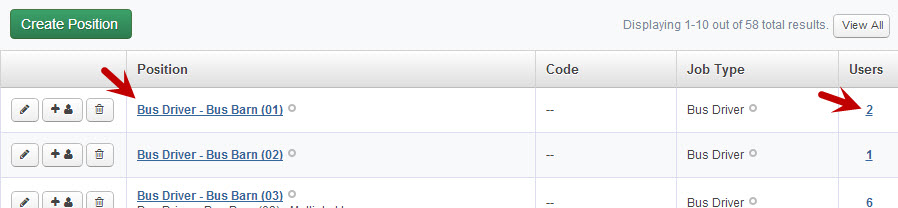
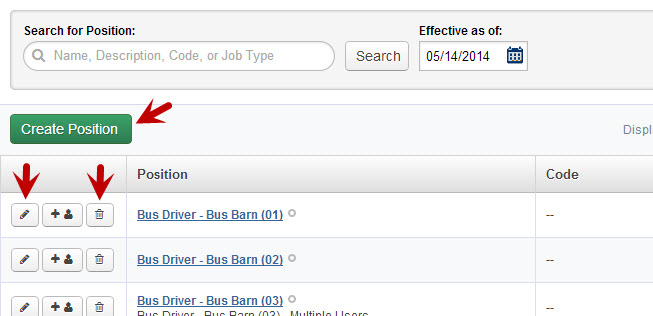
On this initial page you will see a list of the Positions that have been created in your district. At the top of the list you will see a search bar. You can search for a specific Position by name, description, Code, or Job Type.
You can also specify an “Effective as of Date”. Changing this date will show you the list of Positions as they were on that date.

In the list itself you will see that the name of the Position is a hyperlink. You can click this link to be taken to the Position Details to see more info on the specific Position. In the far right column you will see a number which represents the number of Users who are assigned to that position. You can also click this number to be taken to the Position Details.
Adding a User to a Position
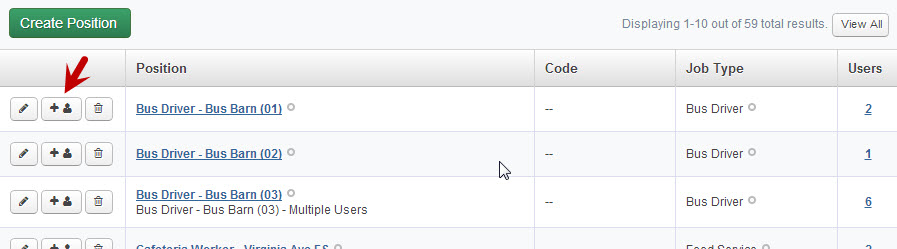
From the list of Positions you can add a User or multiple Users to a specific Position. To start the process click the button with the “plus sign” in the row of the Position you would like to add the User to.
This will open a two step wizard.
On the first step search for the name of the User you would like to add. Simply enter their name into the search area and click the Search button. You can search by full or partial name.
When the search result come up, click on the name or names you would like to add to the Position. You will know when you have selected the name correctly when the name turns yellow. Click the green Assign Selected Users button to move the selected Users into the Users to be added area.
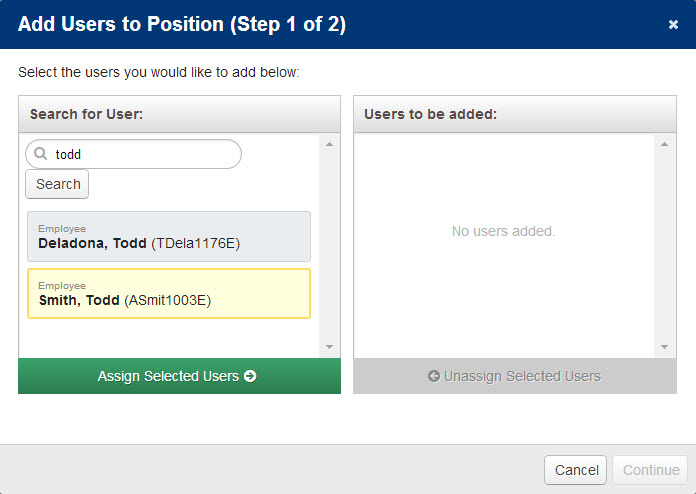
Click the Continue button to move to the next step.
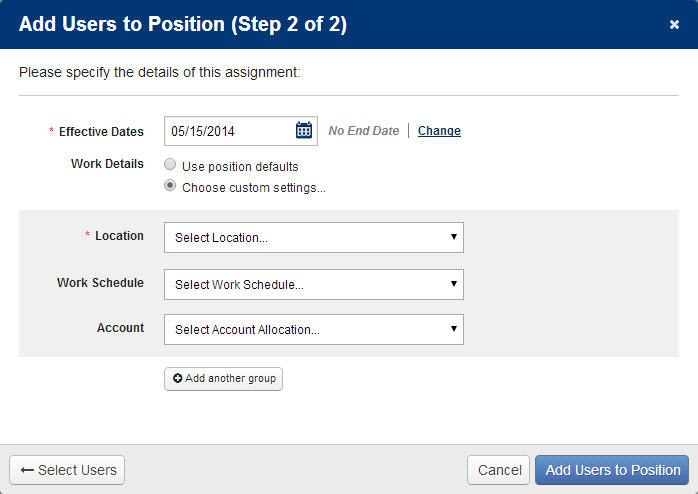
On Step 2 you will specify the details of the assignment. Select the effective dates for the Users you are adding. Also choose if you want the Users to have the position defaults or if you want to choose custom settings for their Location, Work Schedule, and Account.
When you have finished making your selections click the Add Users to Position button to finish the wizard.
You will received a success message letting you know the Users have been added to the Position.

Adding, Editing, & Removing Positions
To add a new position click the green “Create New Position” button at the top of the list.
To edit an existing one, click the pencil icon. To delete one click the trash can icon.
Once you click the “Create New Position” button or the edit button you will be taken to a multi-step process to create or edit the Position.
Step One: Add a Name
The Description is not required but if you do use that field we do not recommend using the same thing that you put in the Name field.
Choose the Job Type that this Position will be associated to.
Add a Code if needed for this Position.
If this is an existing Position you are editing you will also be able to choose which date range you want to view. For a new Position you will be able to specify date ranges on the next step.
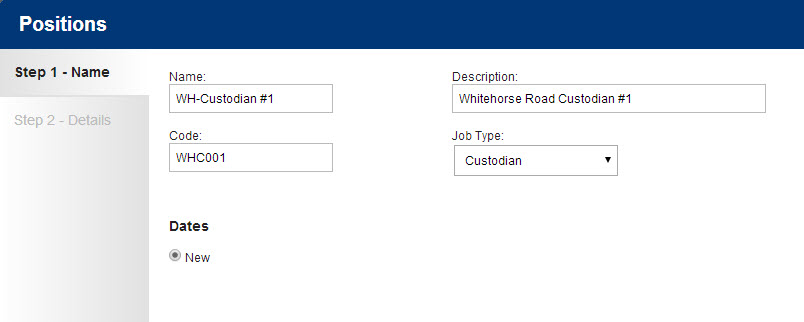
Click the Next button to move to the next step.
Step Two: Add Details
On the details screen give the Position its effective dates.
You can also add a specific location, work schedule, accounting code, and/or FTE. To add these details to the Position click the Add button. Once you have added them they will show up in the Existing column.
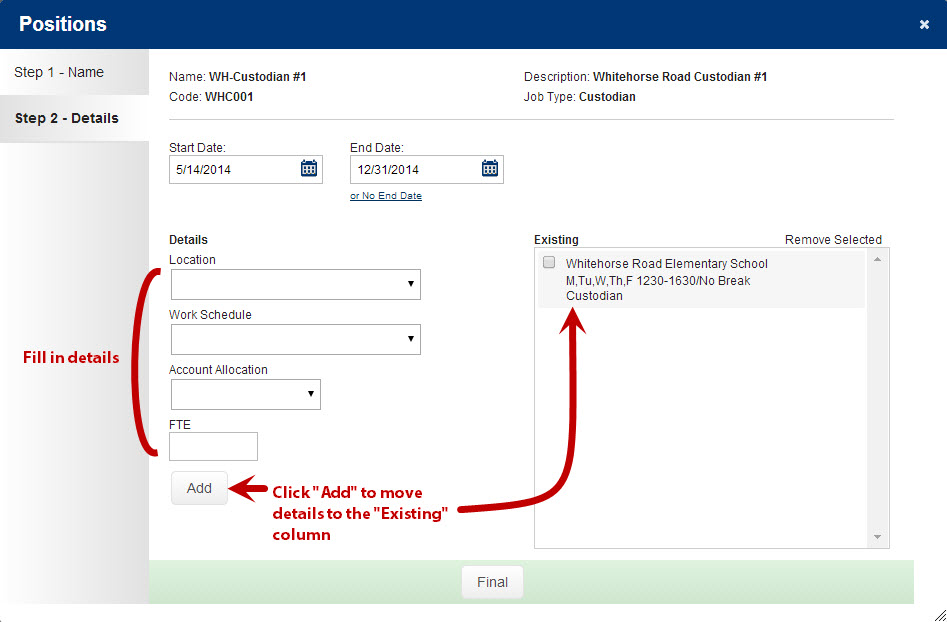
When you have finished adding details click the Final button to be taken to the Position Details page.
