What You Need To Know Before Creating Barcodes
Our strong recommendation is to use either the “Interactive: Barcode” or “Interactive: Integrated” kiosks if you have users that will be scanning into VeriTime. These kiosks only require the use of a user barcode.
How To Create User Barcodes
To start the barcode creation process click the Barcodes option under the Configure tab.
You can create barcodes based on single criterion or a combination of criteria. First, choose the Type of code you want to search for. We recommend using User Barcodes.
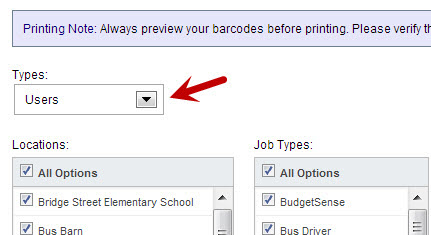
Selecting “Users” will attempt to create codes for Users based upon the Location(s), Job Type(s), and Time Event Type(s) you wish to search through. You may also search for a specific User’s name in the text box below the “Locations” selection area.
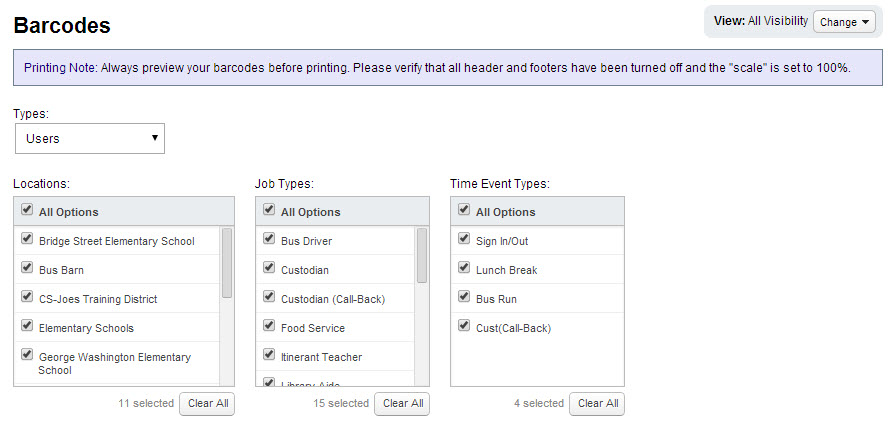
Make the appropriate selections and click the “Search” button to generate the bar codes.
Here are a couple of examples of how to get the barcodes you need:
If you select all locations and then only select “Custodian” in the Job Types option VeriTime will generate barcodes for all Users with the Job Type “Custodian” regardless of what location they work at.

You can also be more specific in what barcodes you want generated. In the below example we only select one location for Custodian. This will generate only the barcodes for “Custodians” who work at that location.
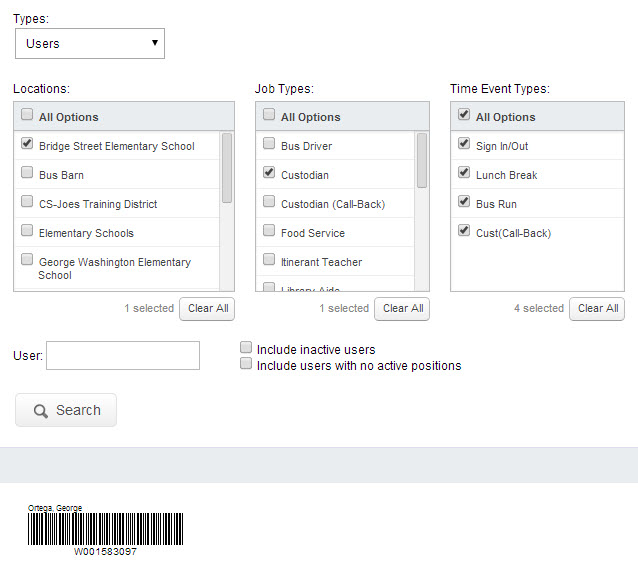
This basic User barcode should be all you need.
If you use an In/Out kiosk, and you want to know more about User Combo Barcodes, learn more here.
Ready to print your barcodes? Check out this article: How to Print Barcodes
