VeriTime’s Account Allocation feature allows you to attach multiple Accounting Codes to a single Position and delegate what percentage of that Position’s funding comes from each Accounting Code.
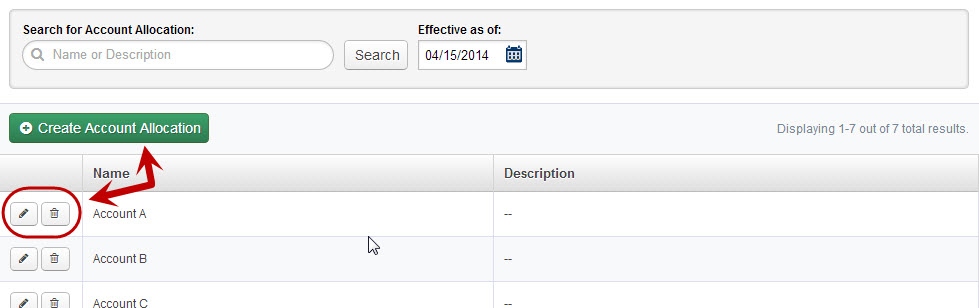
To get started go to the Configure tab and select Account Allocations

To add a new Allocation click the green Create Account Allocation button. To edit an existing one, click the pencil icon. To delete one, click the trash can icon.
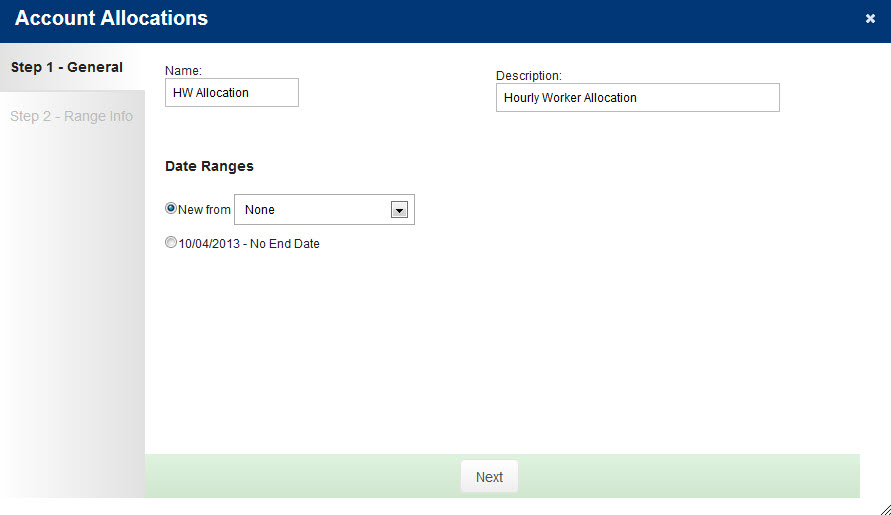
Step 1 – General
This step allows you to create the name and description of the Allocation as well as choose a new or preexisting date range.
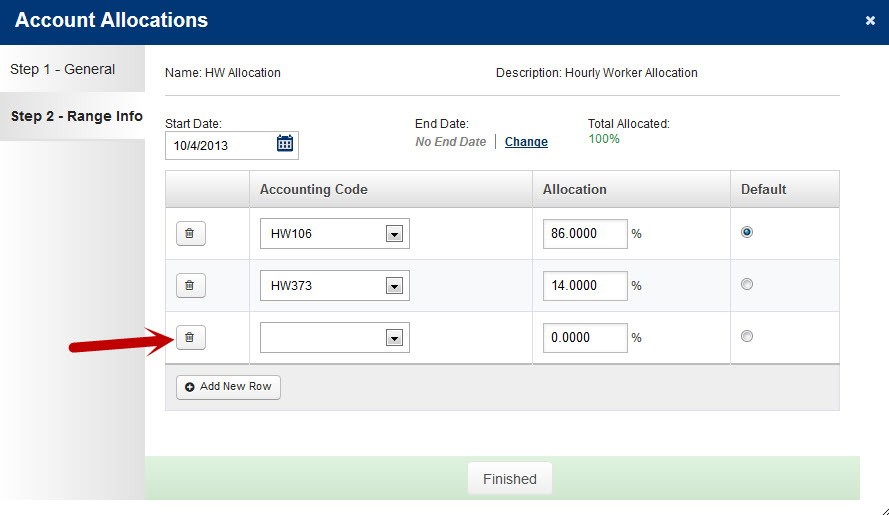
Step 2 – Range Info
This step allows you to select as many or as few Accounting Codes as you need, as well as the percent allocated to each code and the Allocation date range. The total allocated amount must equal 100%, and you must select which Accounting Code is the position’s default funding source.
After clicking “Finished” you can attach the Account Allocation to a Position in the “Details” step of the Positions Wizard.
