This article explains how employees enter time onto their own timesheets.
Log into VeriTime and click the Timesheet icon on the “Home” tab.
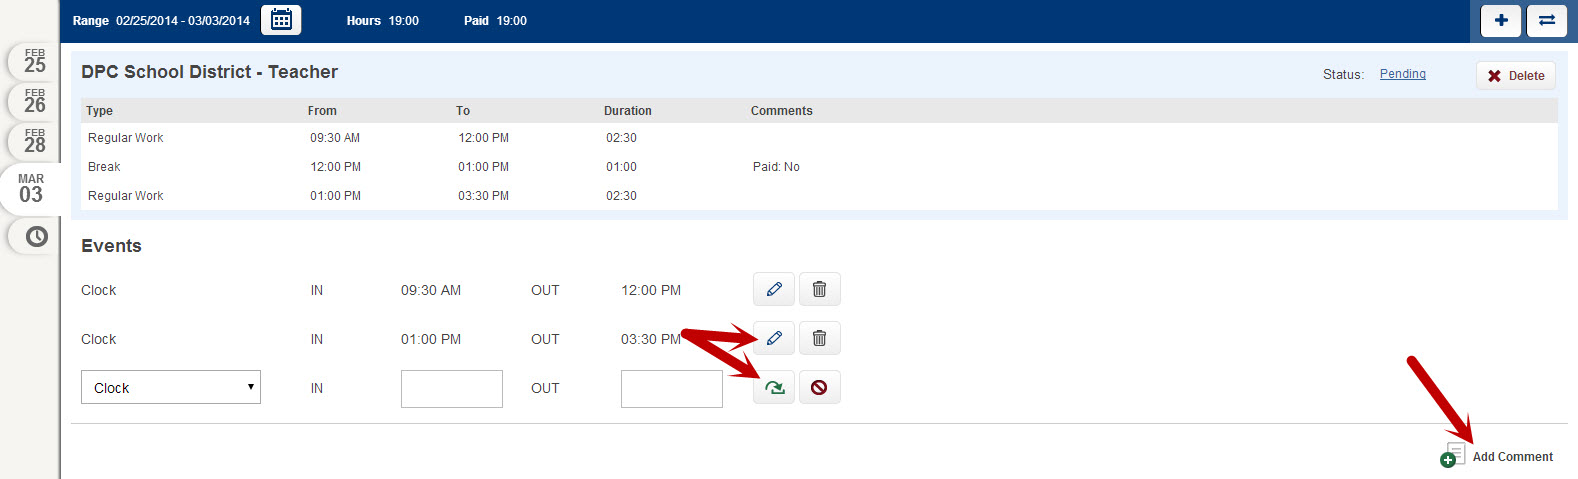
Here, you can look at the current or past weeks’ timesheets, scheduled time, time entries, and a summary for the week of the time collected.
The days of the week appear on the left hand side as tabs. At the top of each timesheet is the Location and Job Type of that timesheet. You may have multiple timesheets per day, representing different combinations of locations and jobs you are allowed to work. If you are scheduled to work a specific job at a specific location, a schedule will be shown below the Location-Job Type combination that you are scheduled to work.
The “Events” section shows time that you actually worked. To enter time, make sure the correct Event Type is selected (you’ll probably only have one option, unless otherwise instructed) on a row under the “Events” heading, then type the time worked into the open boxes to the right of the Event Type. Click the green arrow to the right of the time being entered to confirm completion of this entry of time.
To edit previously entered time, click the edit pencil to the right of that time, make necessary changes, then click the green arrow to confirm that the change is complete. Click Add Comment below each timesheet to add a comment. Once finished making changes, click Save at the top or bottom of the screen.
At the bottom, you can look at your week summary, save changes you’ve made by clicking the Save button and click Submit to send your timesheets for approval.

